Jedox offers a wide selection of customizable "Actions," which can be defined for the spreadsheet form elements (such as buttons, checkboxes, DatePickers, and comboboxes), or for Canvas components. Adding an Action to a form element or Canvas component allows the report users to execute a specific operation by clicking on the respective form element or component. A specific advantage of Actions over Macros is that Actions do not need any coding1.
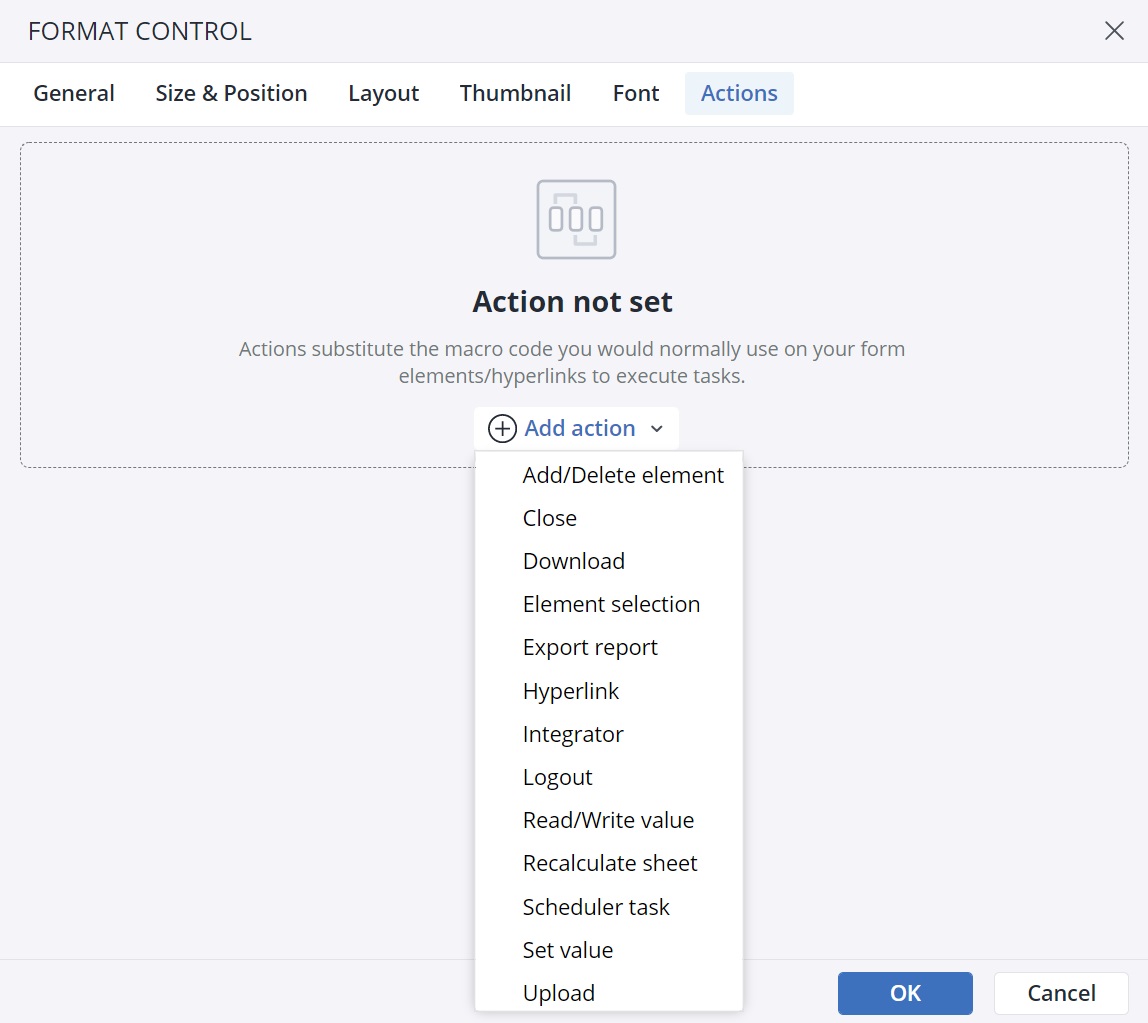
The following Actions are available:
- Add/delete element: creates or deletes an element with a click
- Close: closes the current workbook (execution of this Action is disabled in User Preview mode)
- Download downloads a file
- Element Selection: enables the end users to select elements from a dimension and use that selection as a part of a planning process
- Export Report: enables the end user to export a report
- Hyperlink: executes a hyperlink (execution of this Action is disabled in User Preview mode)
- Integrator: runs an Integrator job; variables of the job can be linked (e.g., to spreadsheet cells or @variables). The behavior of execution is configurable.
- Logout: logs the user out of Jedox (execution of this Action is disabled in User Preview mode)
- Read/write value: reads a value from an OLAP cube cell and sets it to a target (e.g. @variable); can also write a value in an OLAP cube cell.
- Recalculate: recalculates the current sheet (similar to Recalculate button or the F9 key)
- Scheduler Task: allows a designer to execute any type of scheduled job (whether it is active or not)
- Send email: can be used for sending emails
- Set value: sets a value in a named range, cell, or variable
- Upload: uploads a file to Jedox Web Designer. Note that access to Jedox Designer is currently required for full functionality.
In some Actions, users can parametrize the settings by pointing them to spreadsheet cells, named ranges, or variables. However, in this context, the spreadsheet cell references are static, and will not automatically change if they are moved on the sheet (for example, by inserting or deleting columns). They should be manually changed. It is thus recommended to use named ranges, or variables where possible.
Enabling Actions
In the properties dialog of each form element, the "Actions" option offers a range of functionalities that can be executed when a form element is used or clicked on. Actions come with configurable options, and a significant number of these options (for example, reading from a spreadsheet cell) can be dynamic.
You can also set up a customizable confirmation prompt for the specified Actions you define for the form elements or Canvas components. When you add this prompt, the Action is only executed after the end user's confirmation.
Dynamic inputs
Actions offer great flexibility by enabling dynamic inputs for the majority of parameters. While not explicitly selectable, even spreadsheet formulas can be entered and evaluated. To achieve this, you must choose Range from the input context menu.
Note: it is recommended to use spreadsheet formulas in actual cells and subsequently reference them as named ranges. This approach enhances traceability and facilitates the reuse of values. Plus, there is no error checking for formula syntax within an Action.
Using setting keys as source or target
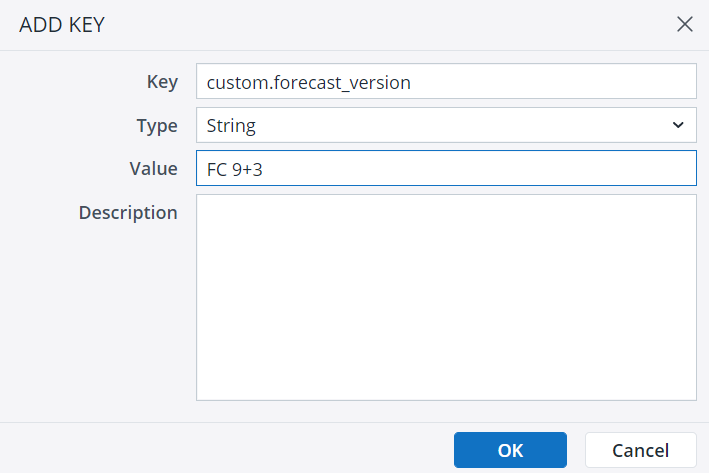
In the Settings Manager in Jedox Web Administration, you can specify a settings key in fields that specify some form of "input" for an Action. To use a setting key as the source or target of an Action, the key's ID must begin with the word "custom." Also, the word "custom." should be added to the key ID during the key creation, as renaming the key ID will not work once it is built.
Note that using a settings key is not supported for most Actions fields that define the "Output" of an Action (where the value in the used target would be changed as a part of the Action execution). An exception to this is the "Target" field of the "Set Value" Action, as you can define a settings key here. After executing the "Set Value" action, the value of the settings key will be changed accordingly.
Multiple Action execution
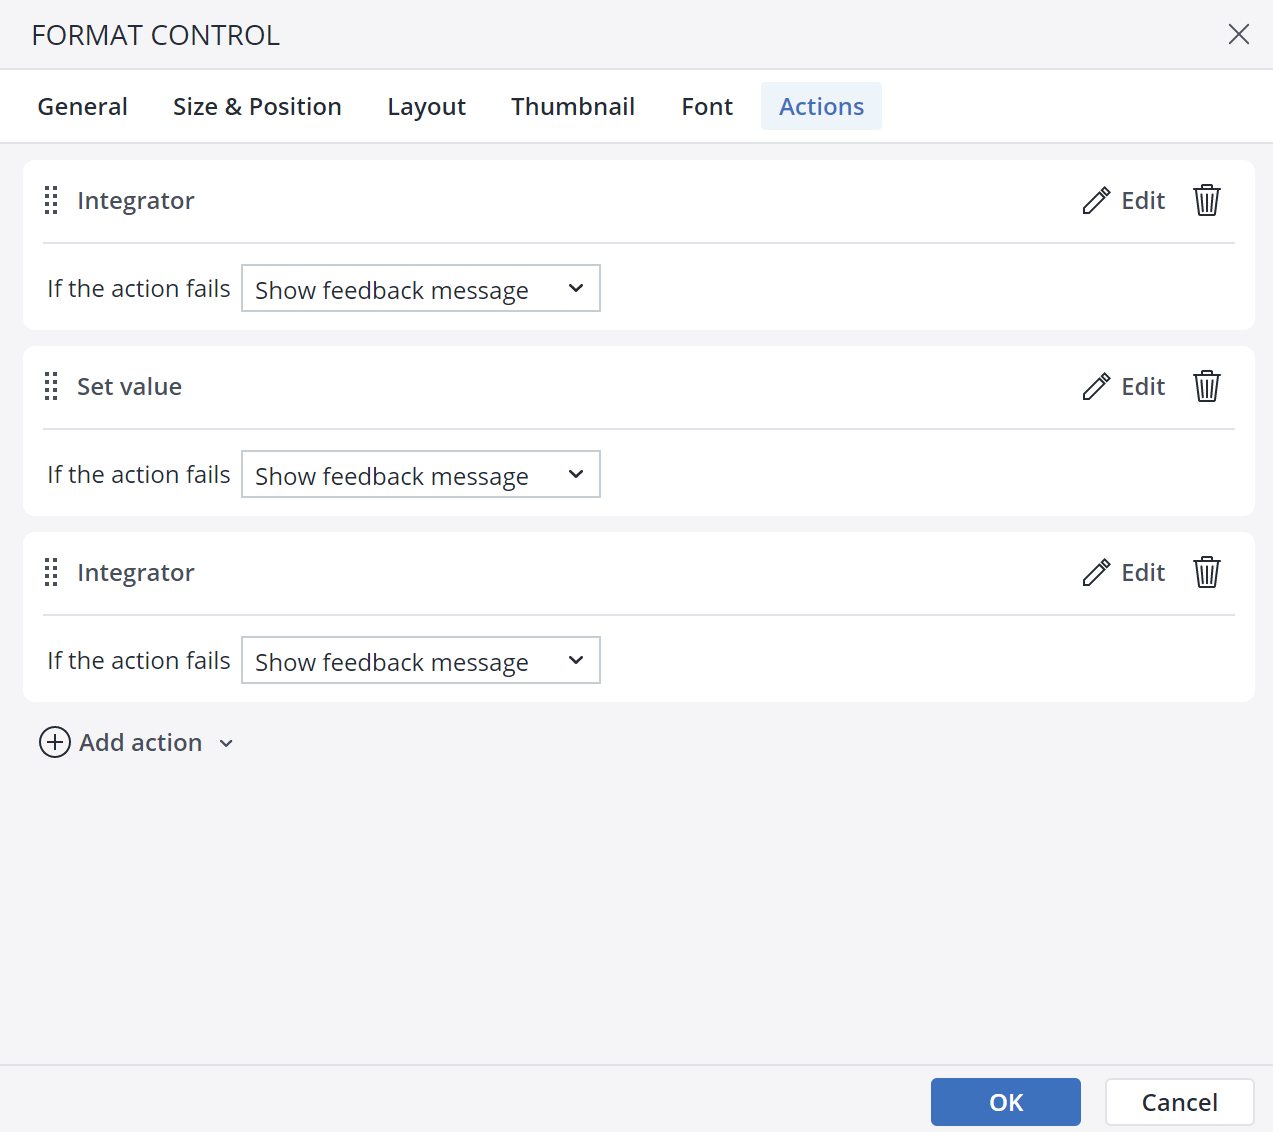
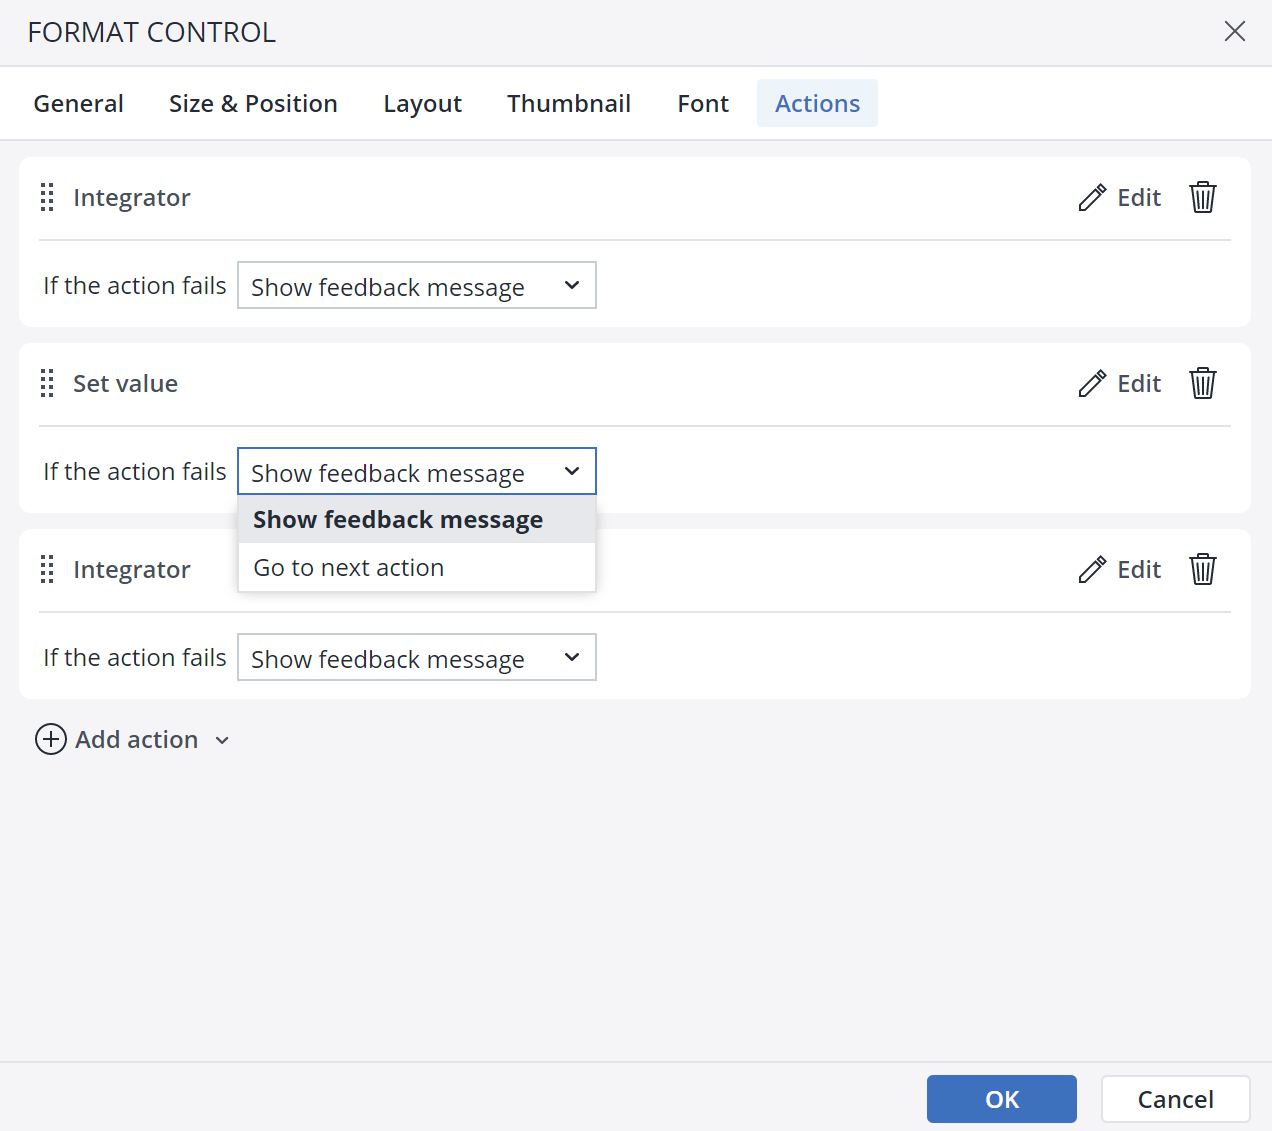
As a Report/Canvas Designer, you can define up to four Actions to be executed in a sequence. For example, you can set a sequence of Actions to first execute the Integrator job 1, then set variable 1, and then execute Integrator job 2.
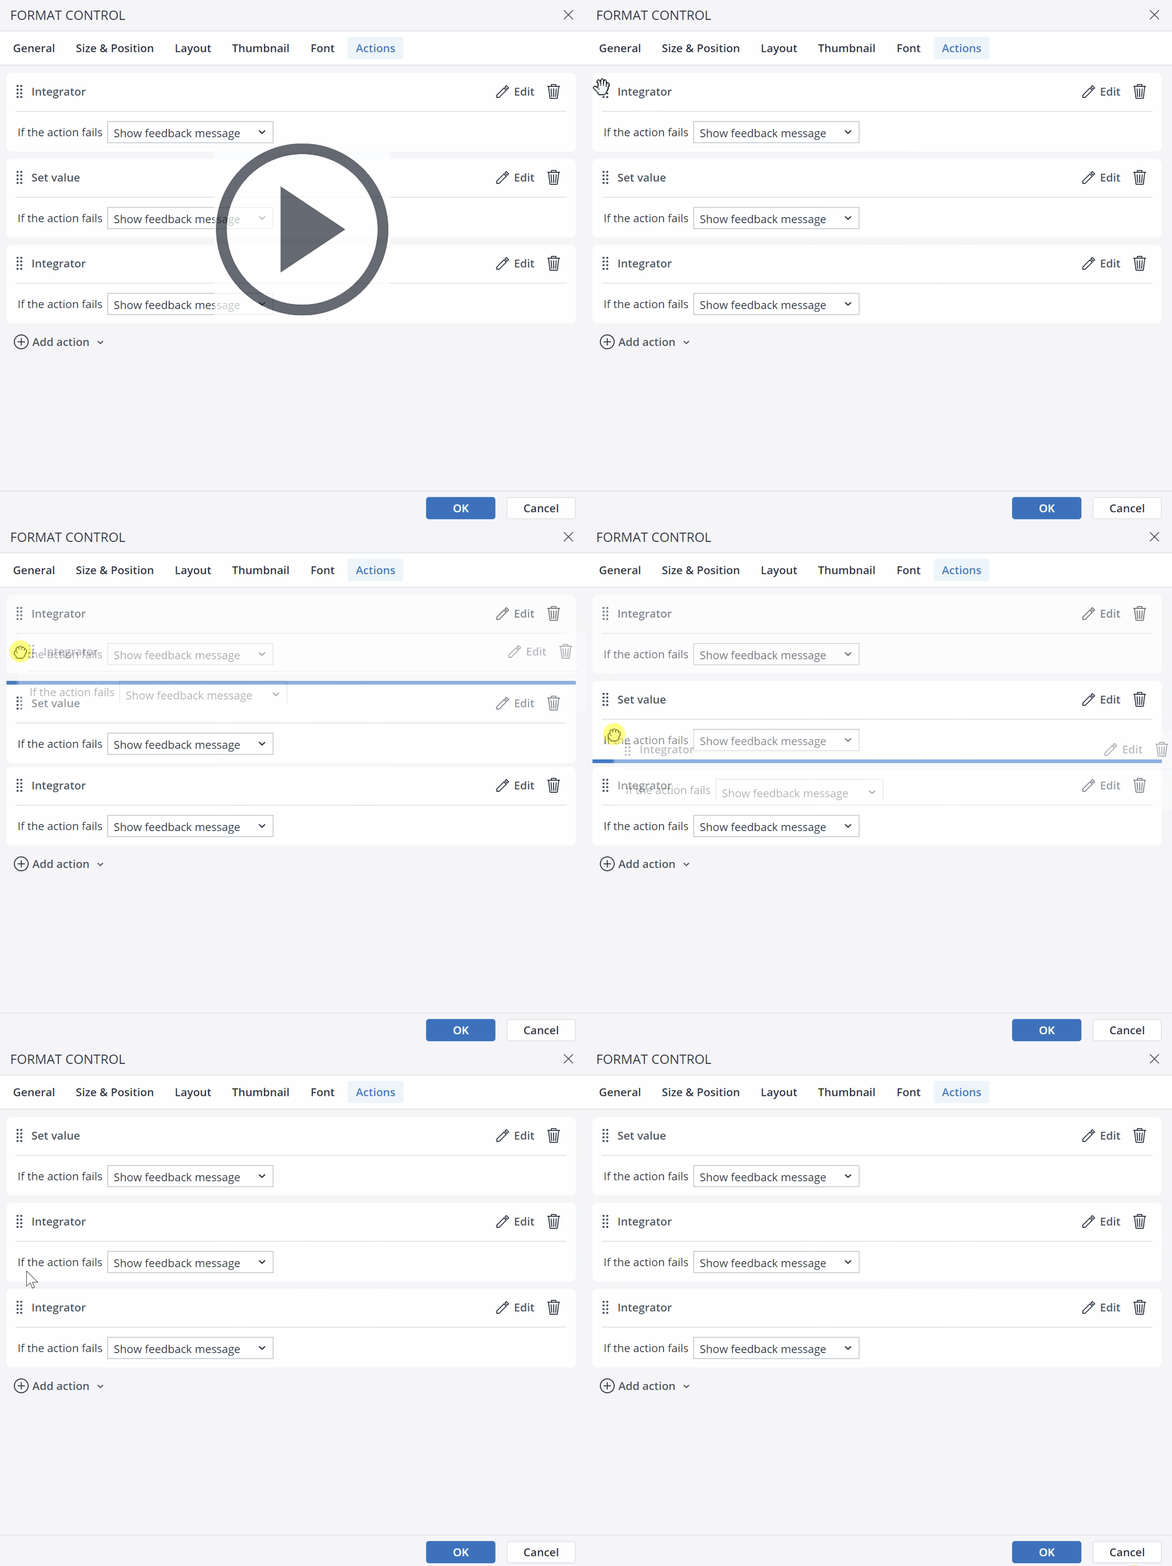
It is possible to reorganize the order in which the Actions are executed. To change the Actions’ order, simply drag and drop them in your desired position. Note that the Logout Action is a terminal event Action, and no other Action can follow it in a multiple-Actions sequence.
You can set up a confirmation dialog for each Action. Also, you can decide what should happen if one of the Actions in the sequence fails. It is possible to either show a feedback message or go to the next Action.
Note that if the end user selects 'Cancel' for a specific Action in the sequence, only that Action is skipped. Subsequent Actions attached to the Button or Form element will still be executed. To avoid running an unwanted Action, set a confirmation dialog for all Actions in the sequence.
Workbook Events
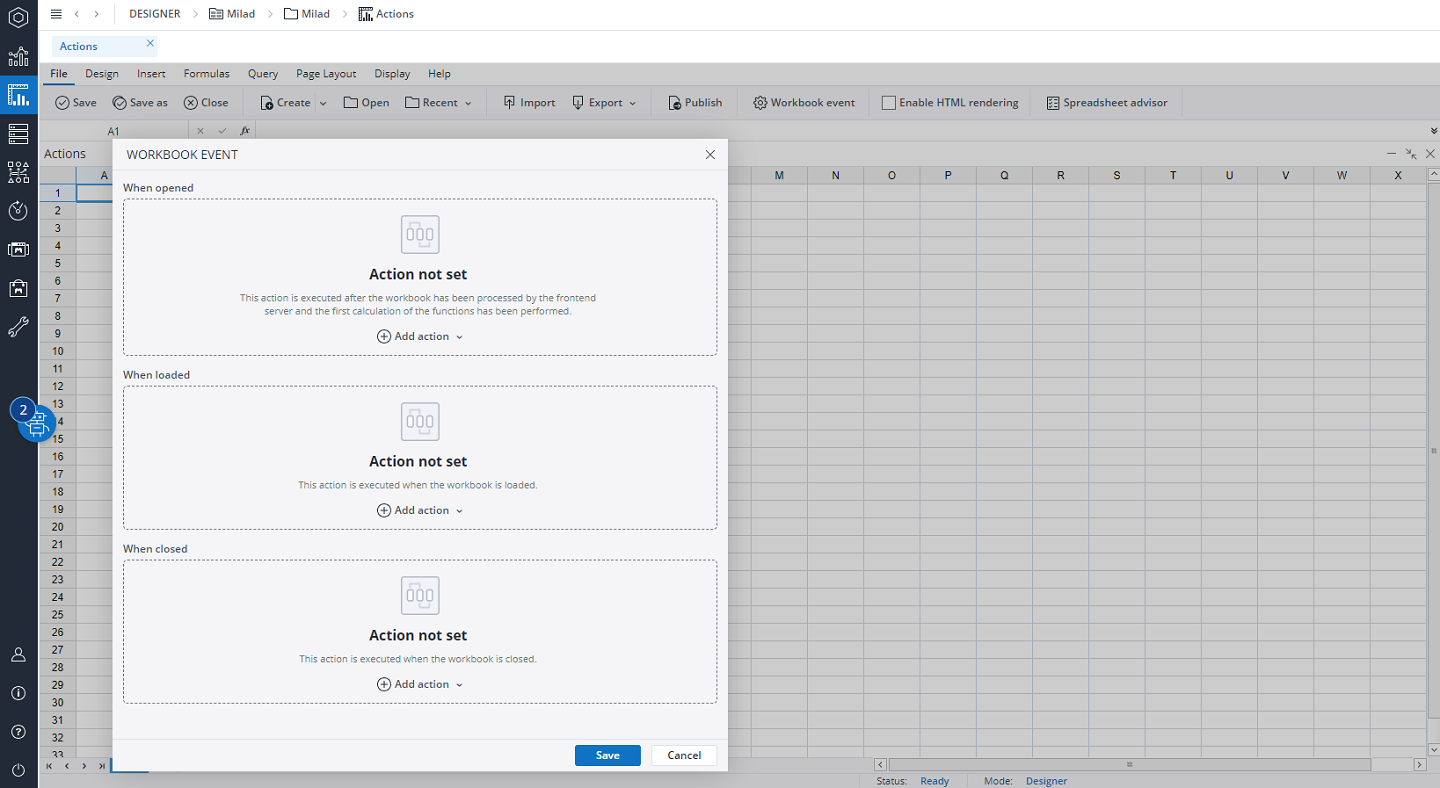
As a Jedox Designer, you can assign Actions to open, load, and close workbook events. This way, the states are initialized or cleaned up without needing to write any macros.
When you select an Action in the "When opened" tab, the action is executed after the workbook has been processed and the first calculations of the functions have been performed. The Actions in the "When loaded" tab will be executed when the workbook is loaded, and the Actions in the "When closed" tab will be executed when the workbook is closed.
Also see the Canvas Workbook Event article.
Updated November 27, 2025
