Views in Jedox Add-in for Excel 365 are static, as they are inserted into the spreadsheet without PALO functions, while preserving their familiar manipulation capabilities such as splashing (data entry), expand / collapse, zero suppression, etc. They are not updated with each Excel auto-calculation, giving you more control over modifying their content.
Insert a View
Once connected to your cloud instance, you can insert an existing View from the stored View option or create a new View, both available within the Jedox Add-in ribbon and task pane.
To display the stored Views, select the relevant server, database, and cube. You can search, filter, or sort Views by name, database, cube, type, availability, or modification period. Simply click on the file to automatically insert the selected View.
When you hover over a stored View within the task pane, you can pin or unpin it for quick access.
The  icon in the upper-left corner of the task pane refreshes the connection between the Add-in and the OLAP server. Switching between the task pane tabs also refreshes the OLAP server connection.
If a stored View has a number format defined in the Modeler, it will be applied upon insertion. Editing the format must be carried out in Jedox Web. You can also enable or disable it directly in Excel and ensure the consistency wherever they are used.
Create a View
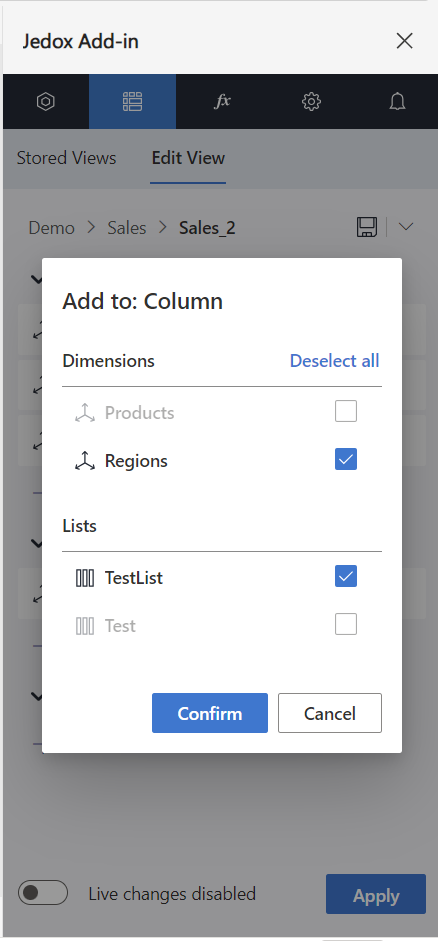
When you choose to create a new View, the task pane on the right will prompt you to first select the database and cube (choose between data and attribute cubes, if enabled), and then the dimensions and elements you want to display. Alternatively, you can start by adding all dimensions to the POV and rearrange them as needed.
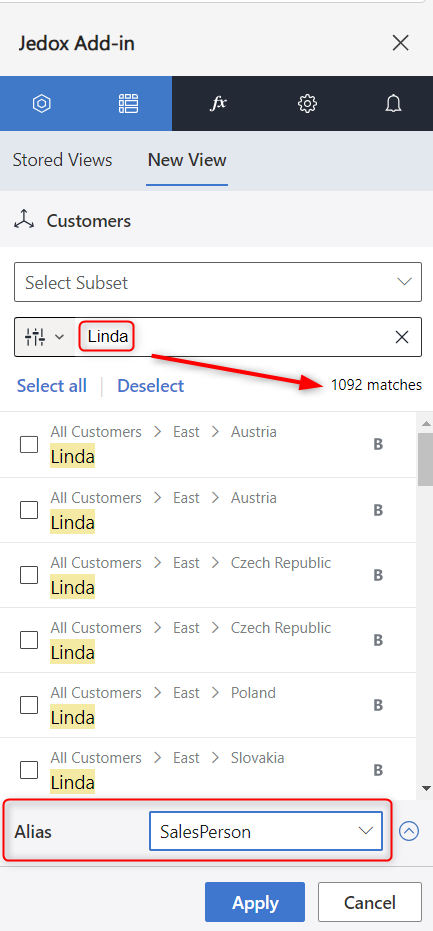
Selecting elements of a dimension, you can use the search functionality to search for specific element names or aliases. You can filter the search ( ) to include, to not include, to be equal to, to start with, or to end with the entered term.
The search result will display how many matches were found (1), whether it is a consolidated element (2) or a base element (3) , and at which path the element is located (4).
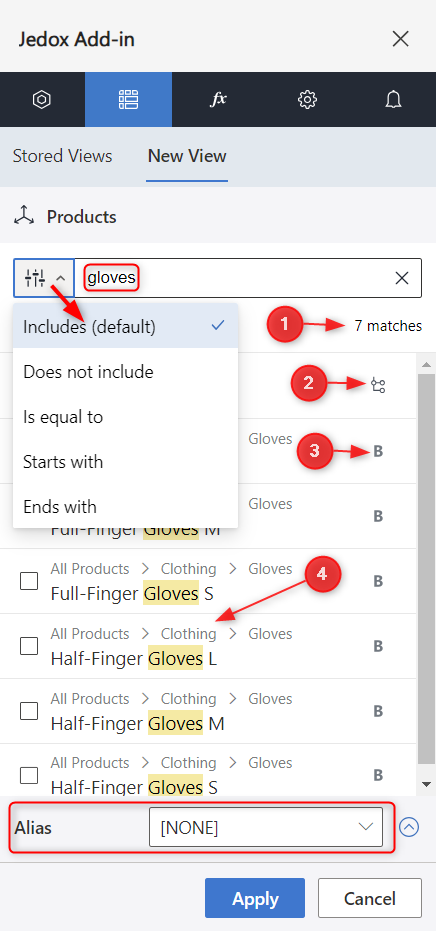
Click on the Apply button to insert your choice or Cancel to revert.
To save your new View, you must use the Save as option by clicking on the ![]() icon at first. Any further changes on an existing View can be saved by clicking on the
icon at first. Any further changes on an existing View can be saved by clicking on the  icon.
icon.
A View selection from an attribute cube cannot be saved.
Edit View
You can also change the content of a View via the Edit View button within the "Jedox View" tab.
In the opened task pane, you can rearrange the selected dimensions via drag-and-drop or select specific elements by clicking on the element icon next to the dimension name. Under More options, you can select the following: Move up, Move down, Move to POV, Move to rows, Move to columns, Select elements, Select variable, Remove dimension, Remove variable.
On the right-hand side of an element level is the context menu  . From there, you can expand and select the related branch or select a specific level of the dimension (with a maximum of 5 levels that can be displayed).
You can also select multiple POV elements, choosing which function to be applied (Sum, Minimum, Maximum, or Average).
When editing the View, there is an option to enable Live changes, eliminating the need for previews and displaying changes instantly. When the option is enabled, the Apply button will be hidden.
Subsets selection
If the dimensions you are accessing contain global or private stored Subsets, the option to insert them will be displayed in the task pane when selecting elements. You can insert them with element names or aliases.
Notes:
- If the dimension does not contain stored Subsets, the selection field will not be available.
- The creation and editing of Subsets is not supported.
- Variables in stored Subsets is not supported and could distort their selection and display.
The PALO.SUBSET.OPTIONS function allows you to handle Subsets within the add-in more easily. Combine with existing PALO.SUBSET functions to precisely control the Subset orientation (vertical/horizontal) and outputs (element name, alias, or indent).
Example: PALO.SUBSET("localhost/SalesDemo","Measure",1,,,,,,,PALO.SORT(1,0,,0,,0,1,,),PALO.SUBSET.OPTIONS(0,2))
Lists selection
Available Lists can be added to rows, columns, or the POV. Selecting a List will block the selection of dimensions that are statically used in that List and vice versa.
The creation and editing of Lists is not supported.
Lists containing columns with ${fx} expressions are not supported and cannot be calculated.
Keep & Remove
After inserting the View, you can quickly change the analysis focus by either keeping or removing certain data elements. To reverse the changes, you can edit the View from the task pane or use the Undo button on the tab.
Both functions can only be executed if all selected elements belong to the same dimension, are not duplicates and do not appear in both rows and columns.
Notes on using Keep with nested dimensions:
- This function cannot be executed if the same element is selected multiple times within an inner dimension (i.e., the same inner element belongs to different outer elements).
- If the selected elements belong to an inner dimension, the elements of the outer dimension will not be affected by the new selection:


Notes on using Remove with nested dimensions:
- It is not possible to remove all elements from an inner or outer dimension, as this will remove the entire dimension from the View.
- This function cannot be executed if the same element is selected multiple times within an inner dimension (i.e., the same inner element belongs to different outer elements).
- It is not possible to remove different elements of an inner dimension that are rendered by several outer dimensions:

The Remove function is not supported in combination with Lists.
Variables in Views
If you have multiple Views in an Excel workbook and want to switch them all to a different month, for example, you can control this using a View variable, similar to the variables for Views in Jedox Web. To do this, you must first create a named range in an Excel workbook (not in a worksheet) and assign it the same name as the variable created in Jedox Web (e.g. varMonth). The value from the named range in the Excel workbook is then passed to the View as a variable. If your Views contain variables, you can select them from the "More options" menu in Edit View. You must update the workbook after each change.
Drillthrough
To access additional relevant information that is not initially presented in your custom report or View, select an aggregated cell and click Drillthrough. The detailed base-level information behind the aggregated data will be loaded into a new sheet labeled Drillthrough.
You can only utilize the Drillthrough functionality within Jedox Views and custom reports using PALO functions.
Text Editor
Users with write permissions can select a string-type cell stored in the cube, e.g. Comments, to open the text editor, allowing text input. Right-click on the string cell to open the context menu and navigate to Jedox > Text Editor.
Cell Tracer
The Cell Tracer allows you to trace the origin of calculated values on PALO.DATA* cells. The Cell Tracer dialog is available from the context menu. Right-click on a cell and navigate to Jedox > Cell Tracer.
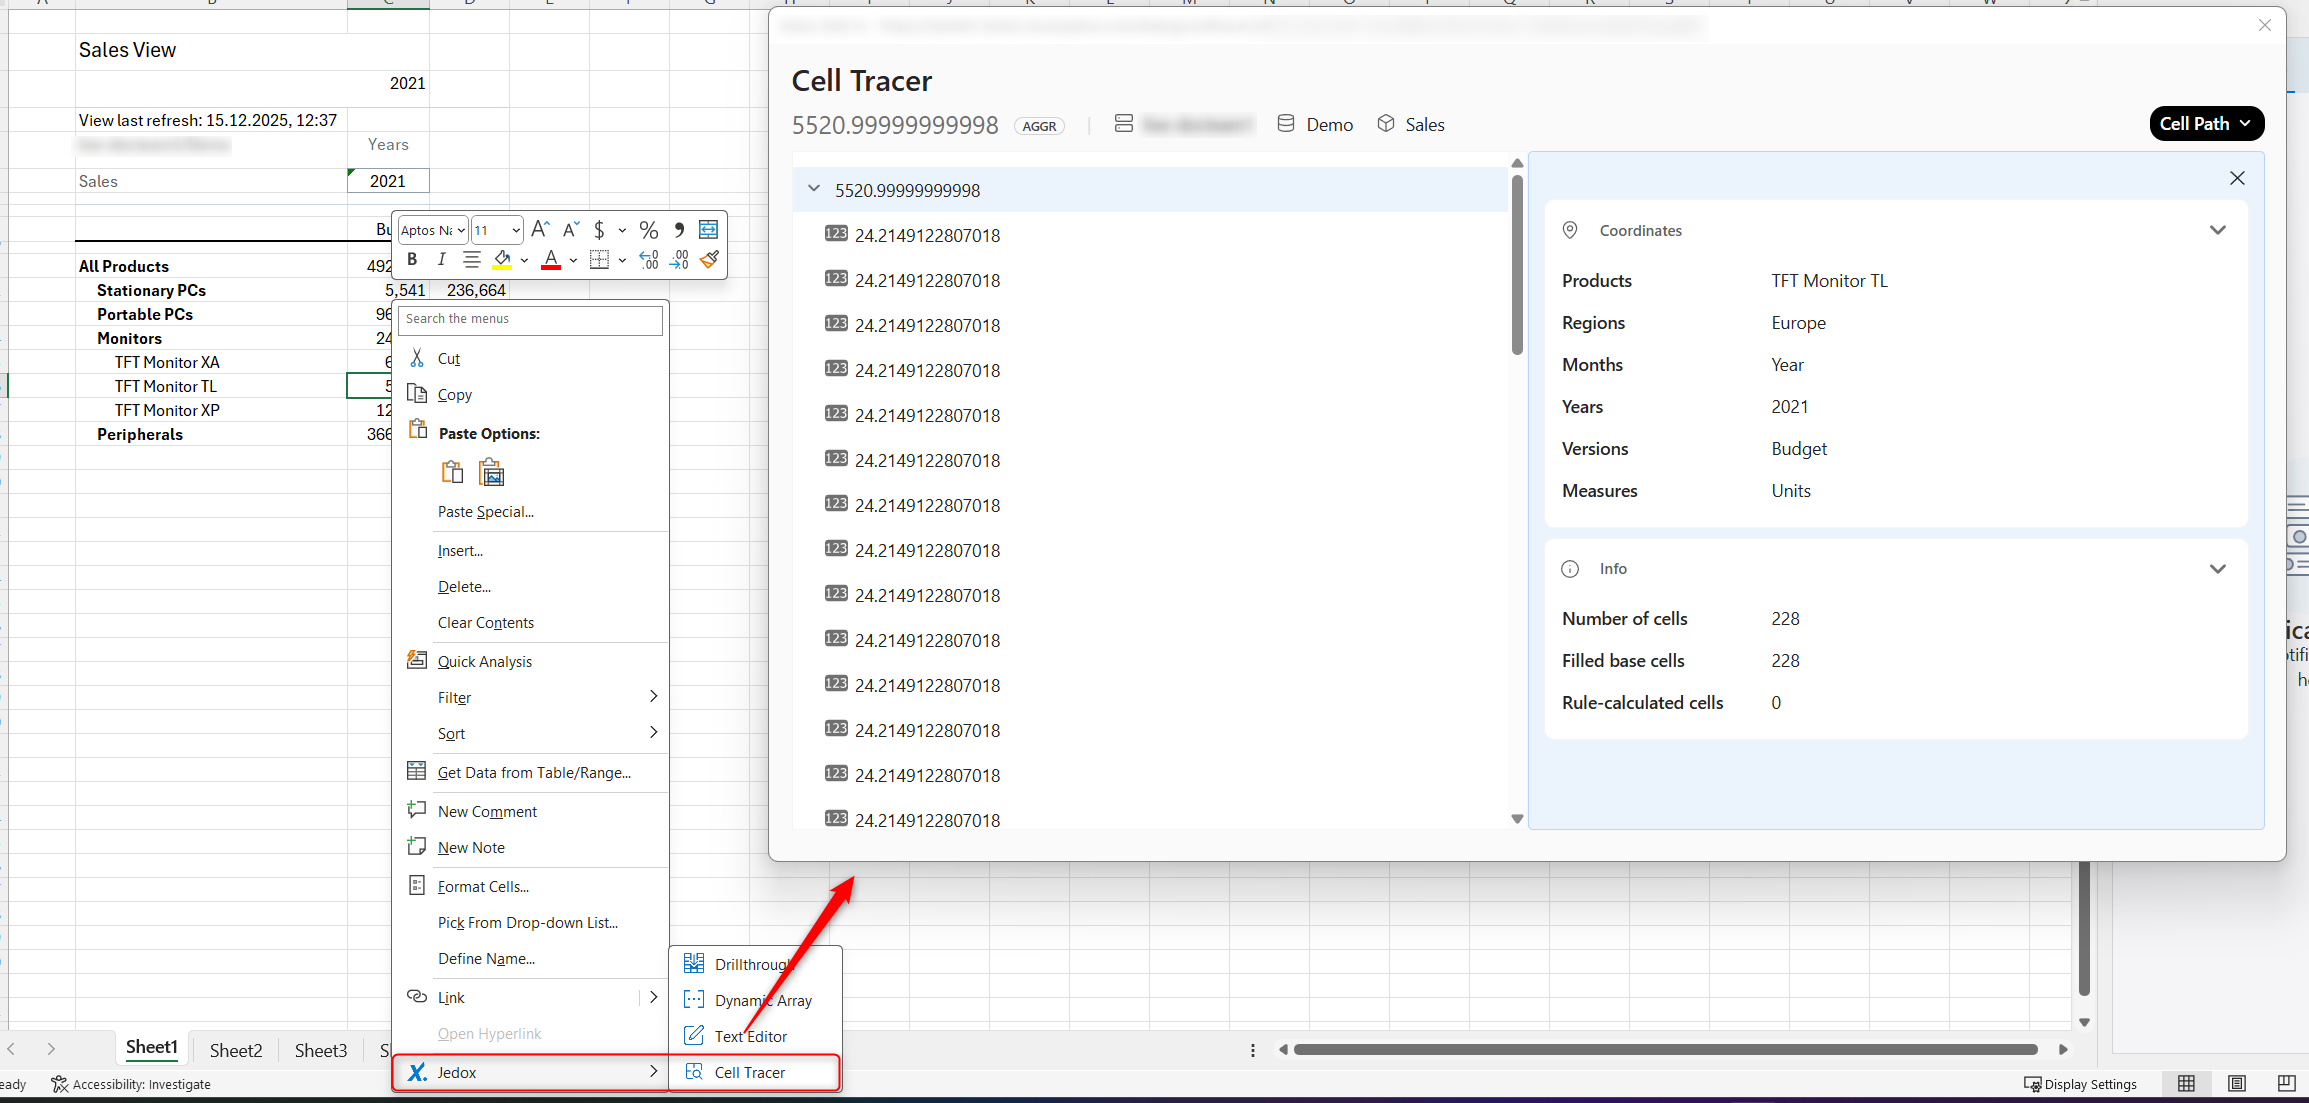
It shows, e.g., whether it is a numeric base value, an aggregated value, or a rule-based calculated value. In rule-based calculated cells, the ID of the rule is displayed, making it easier to locate in the cube. You can also check the rule itself via the dialog box. The Cell Path menu displays the coordinates.
View format
You can quickly change the layout and format of the View by suppressing zeros, enabling or disabling the number format, and expanding or collapsing the underlying child elements (by clicking on them) in rows and columns.
Change the View's display by swapping the axes, inverting hierarchies, and / or repeating elements.
The View last refresh date will inform you about the last update on the View's content. Note that the date format is fixed to CET and cannot be changed, contrary to the PALO.LASTSHEETUPDATE function.
Data modification
Values can be entered manually by using the splashing commands.
Additionally, you can copy values from a table and paste them into a View or a PALO function area. This will initiate an automatic writeback in which the formulas are retained.
Views must be detached and values must be numeric in order to perform this operation.
Related videos & topics
- Element search
- Access stored Subsets
- Access Lists
- Drillthrough for Views
- Cell Tracer
- Variables in Views
- PALO.SUBSET.OPTIONS function for handling Subsets
Note that some of these videos were recorded with earlier versions, but their functionality has remained the same.
![]()
Learn how to create custom reports with the Add-in for Excel 365.
Updated April 29, 2026