Return to Financial Consolidation model Overview
You can use the Workflow Administration Report and Workflow Wizard Report to integrate workflow functionality into your work.
Workflow Wizard Report sets up workflows, data validations, and other tools like email notifications. All details can be found in the article Workflow Wizard.
Once set up, the system owner is allowed to manage existing workflows. Workflows can be started, stopped, paused, and reset. The overview and workflow management can be done via the Workflow Administration Reportarticle .
For more information about workflow in the Financial Consolidation model, see the Special Features in Workflow for Financial Consolidation article.
Process summary
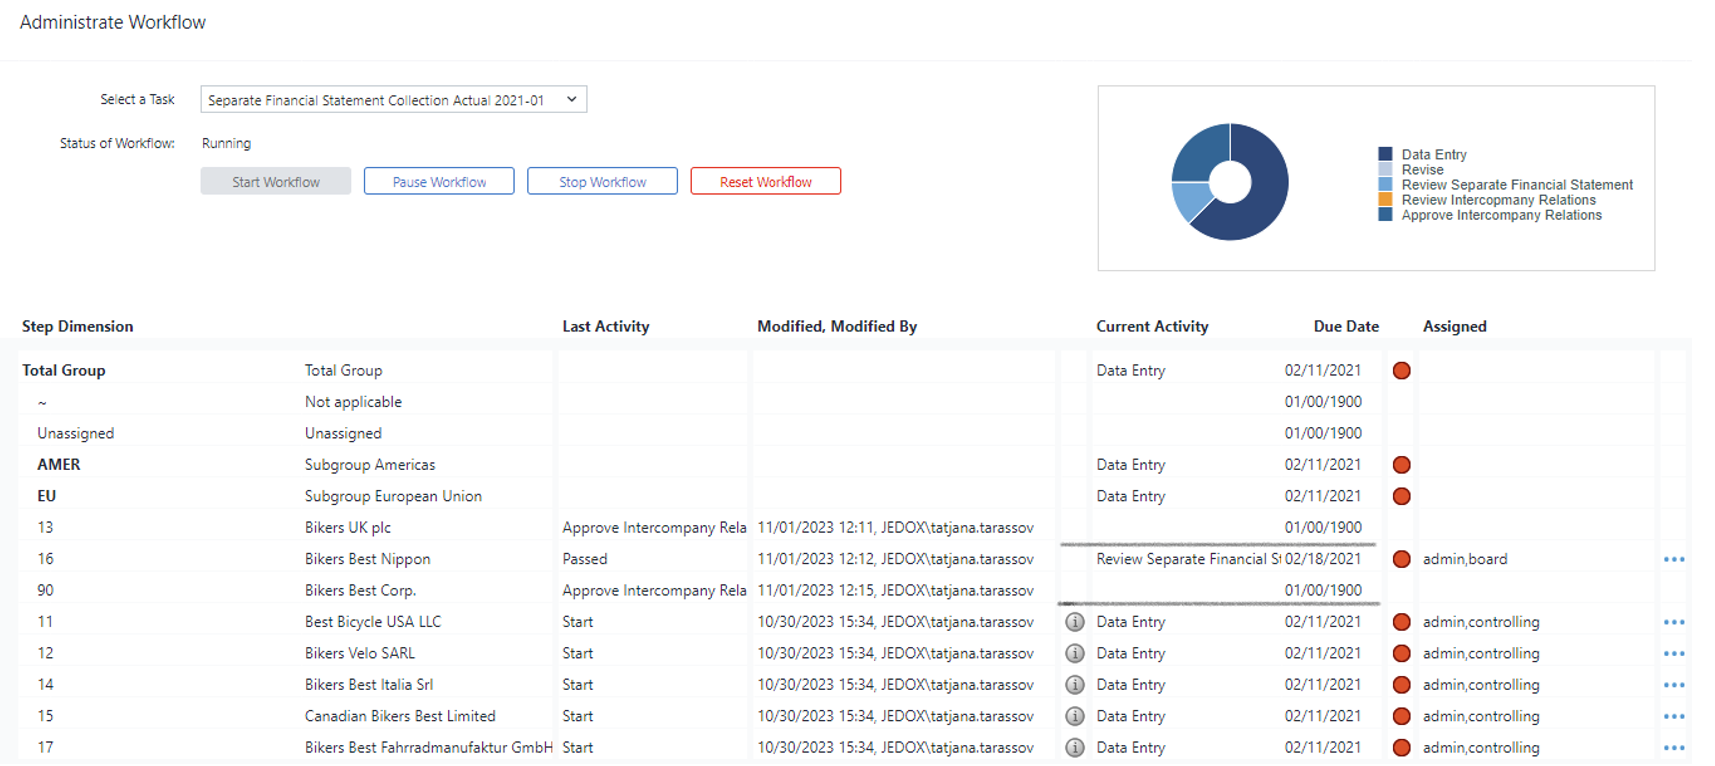
Once a workflow is started, authorized users can see the overview of existing activities on the Workflow Administration Report.
Depending on the Current Activity, users are allowed to/prevented from modifying figures, such as separate financial statements, exchange rates, etc.
The Workflow Detail overview allows authorized user groups to proceed from one activity to another. You can access this overview from the Workflow Administration Report and the main reports, such as Data Collection, Configuration, and Consolidation Manager. This allows the hiding of Workflow Administration Report from unauthorized users while allowing them to fulfill their tasks and understand which step of the process is being performed.
Example
Below, you can see a step-by-step example:
-
To start workflow Consolidation Actual 2020-12, the key user should open the
Workflow Administration Report, select the required task, and press theStart Workflowbutton.
-
Once started, the overview shows all the base elements of the
Step dimension–Total Group,AMER, and EU.
-
3) As soon as
Configurationactivity has been performed, the key user or users responsible for one of the scopes should click on…and then on theProceedbutton on theWorkflow Detailsreport.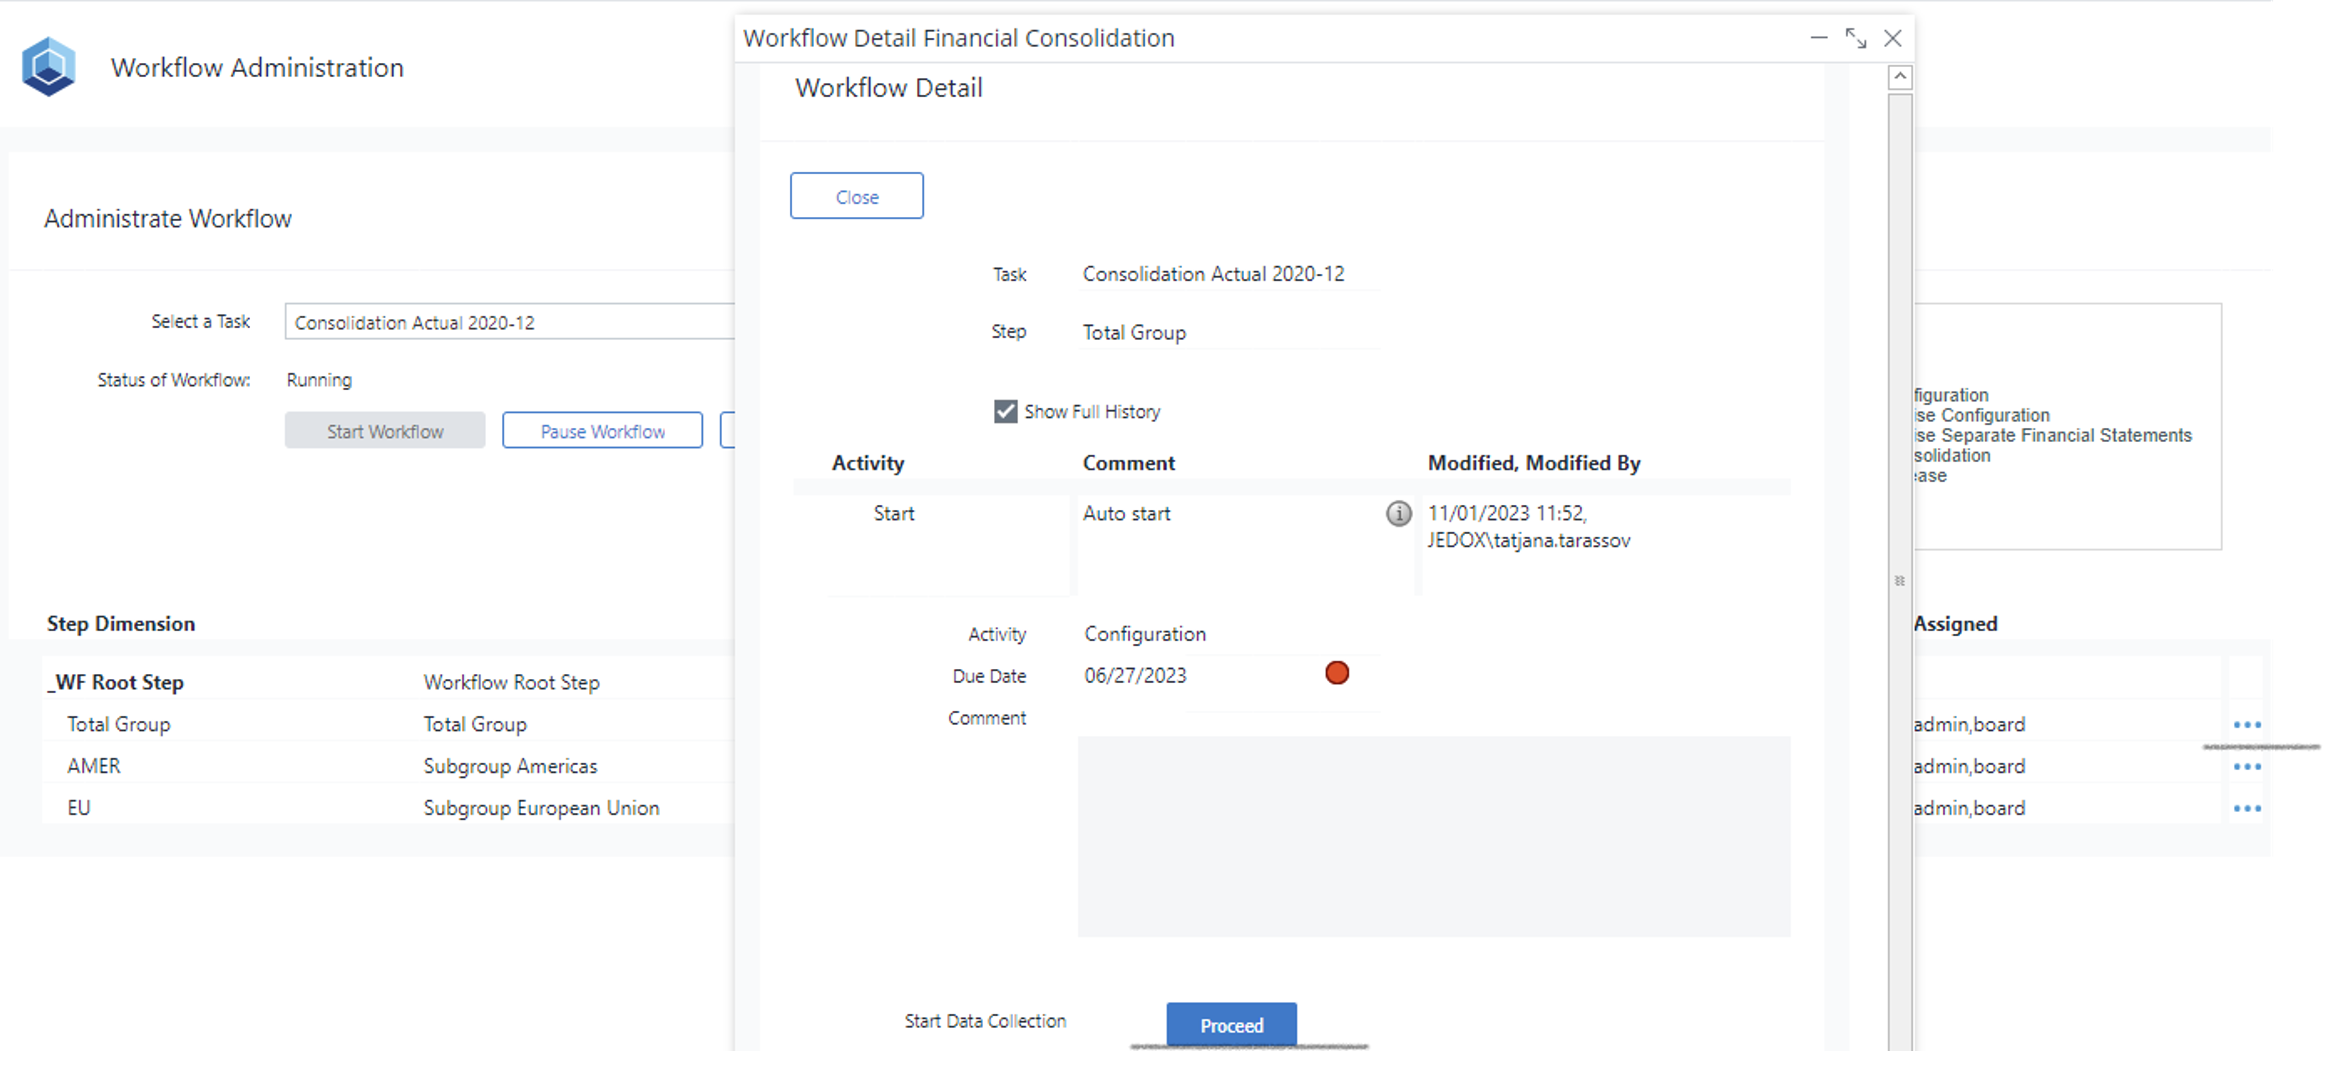
-
If all previous activities have been finalized successfully, after clicking on the
Proceedbutton, the current activity (in our case,Start Data Collection) will start and finish. The next activity shown in the report will be theSeparate Financial Statement Collection.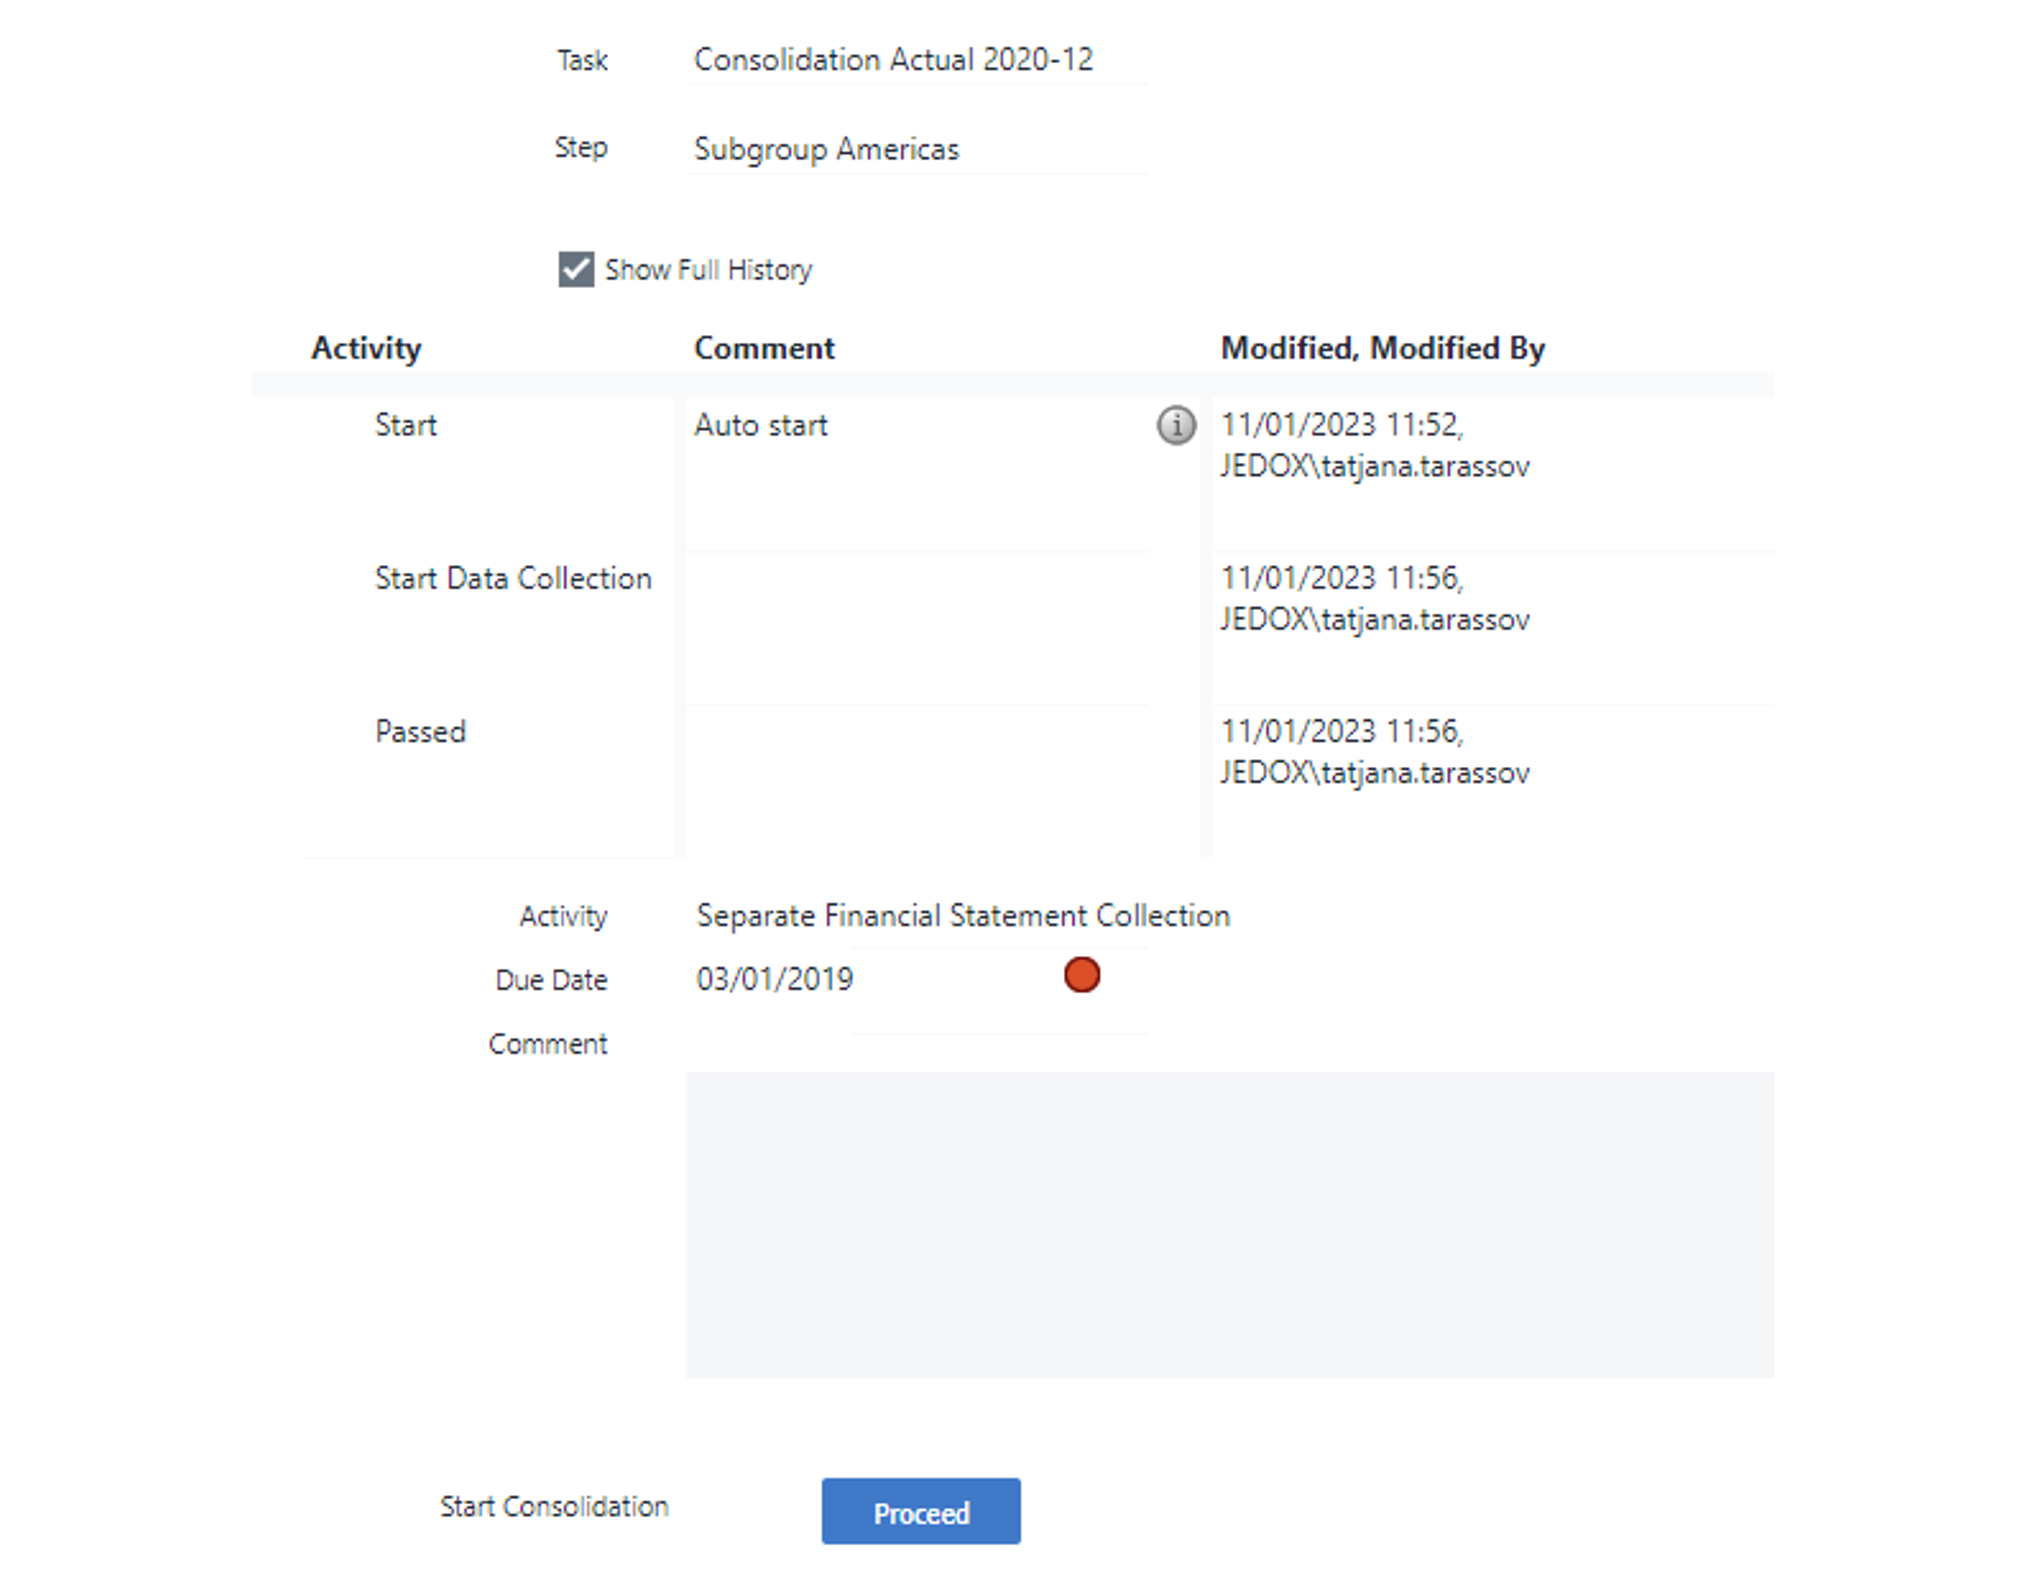
Now, users responsible for singleLegal Entitiesmust uploadSeparate Financial Statements. Once done, they can access the Workflow Details report from theData Collectionreport and click theProceedbutton to signal they are done.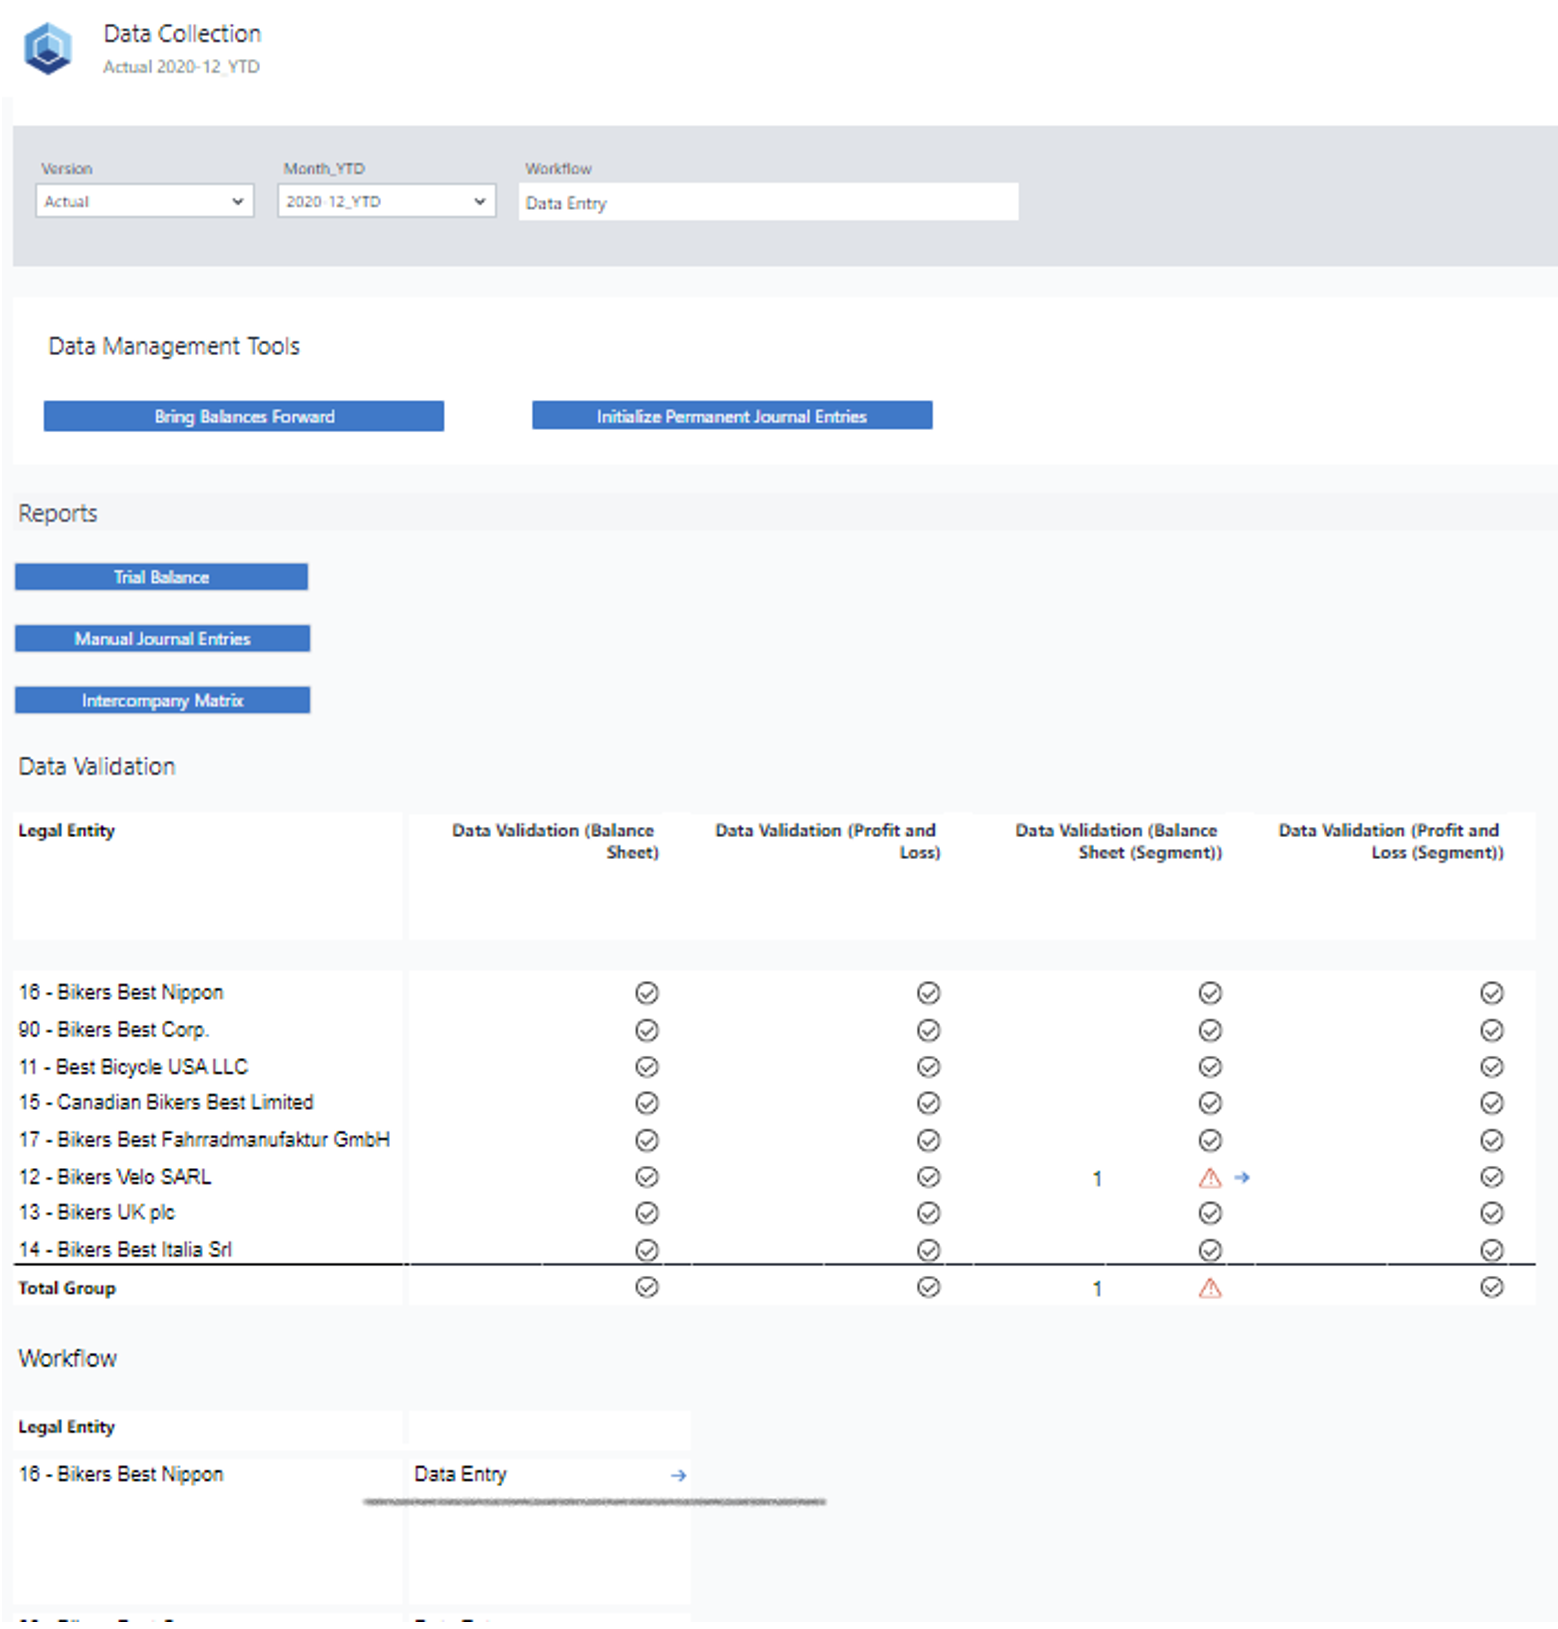
-
If the previous activity is unsuccessful, the workflow will not proceed with the next activity.
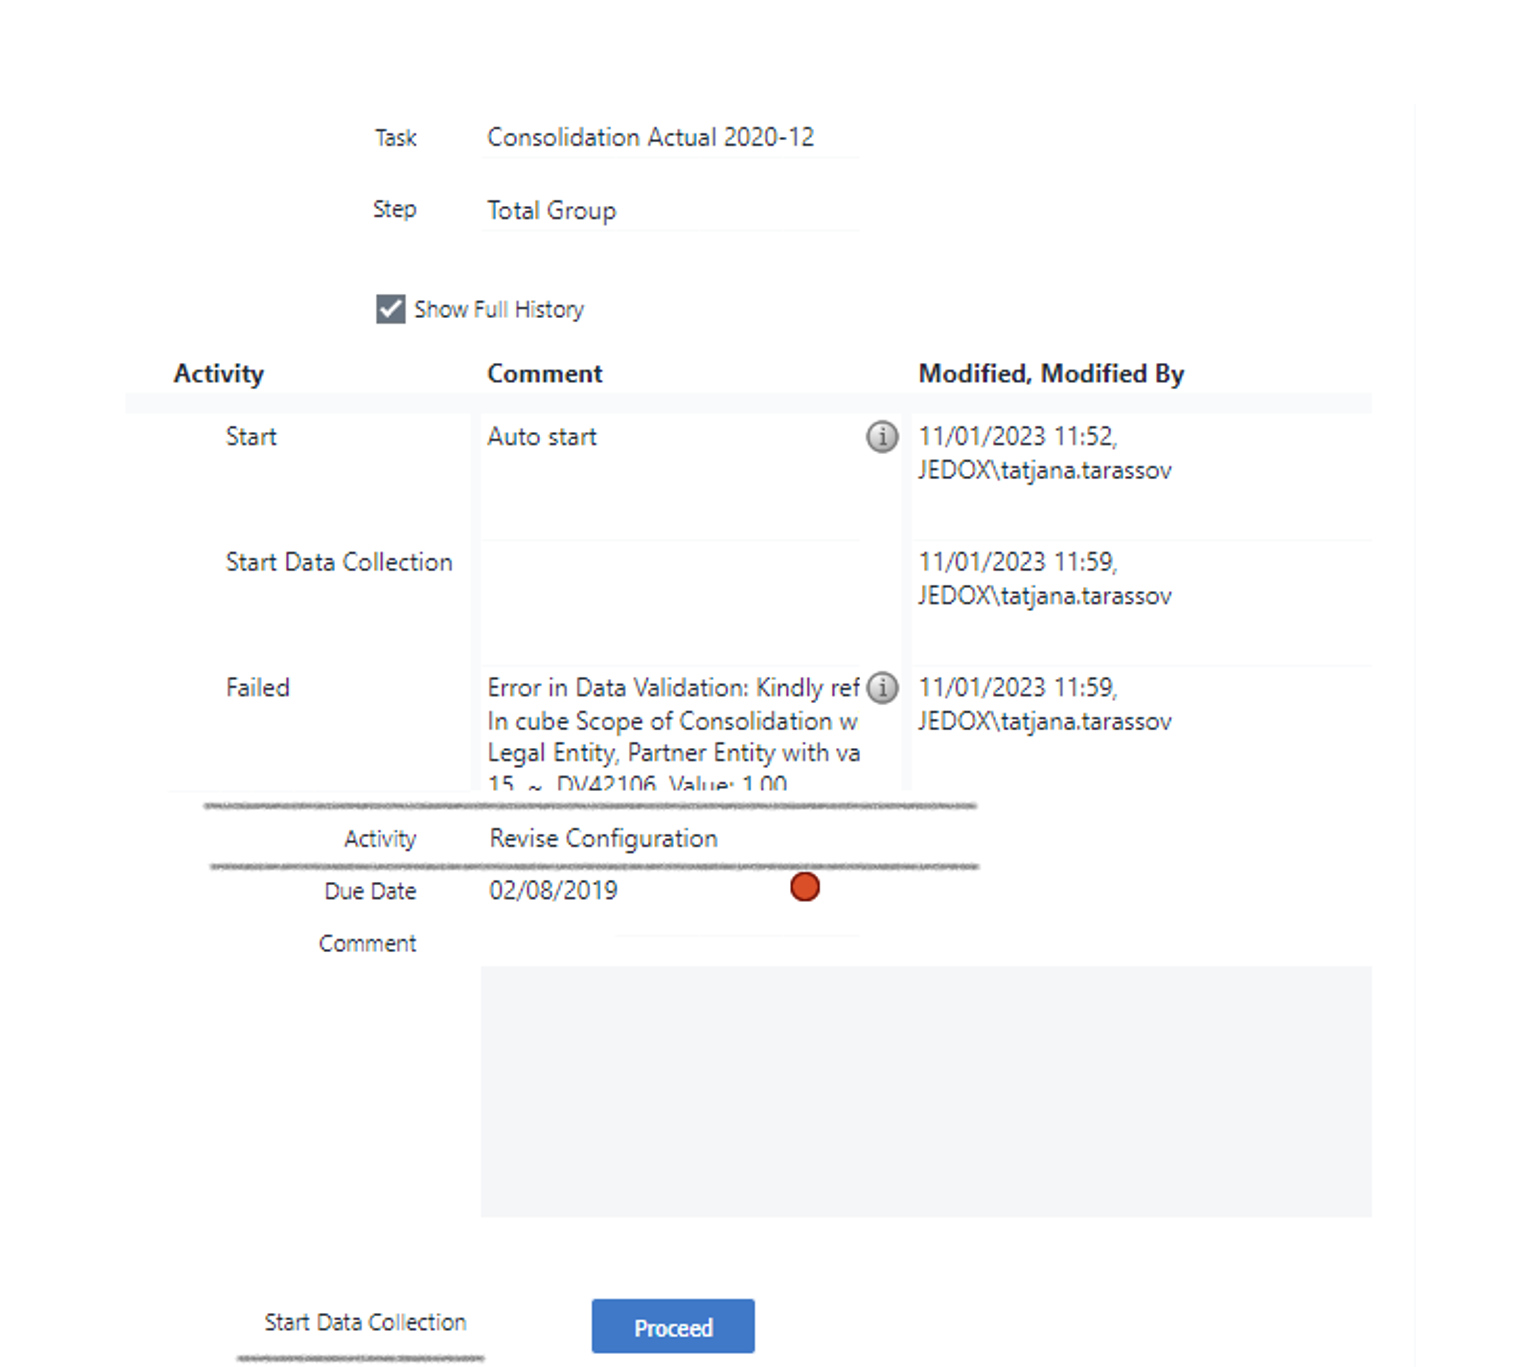
As can be seen in the comments, the current activity cannot be finished due to failed data validation. To see the details, the user needs to go to the Consolidation Manager report: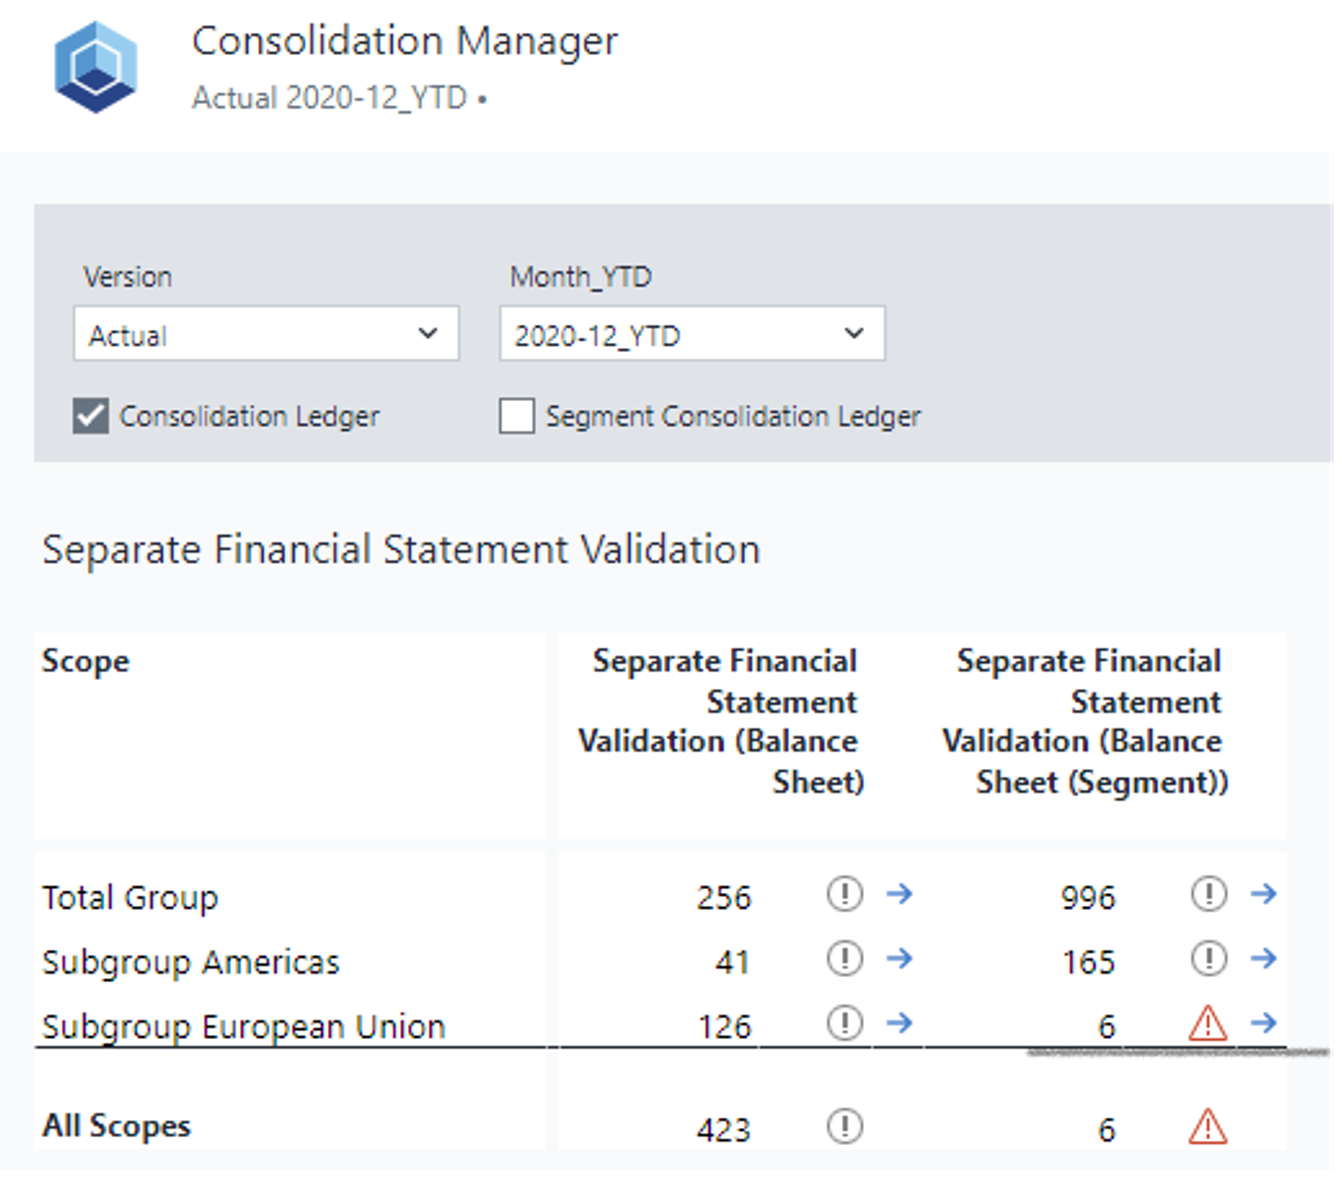
Once all data validation errors are solved, the user can click the Proceed button on the Workflow Details report and go to the next workflow activity. -
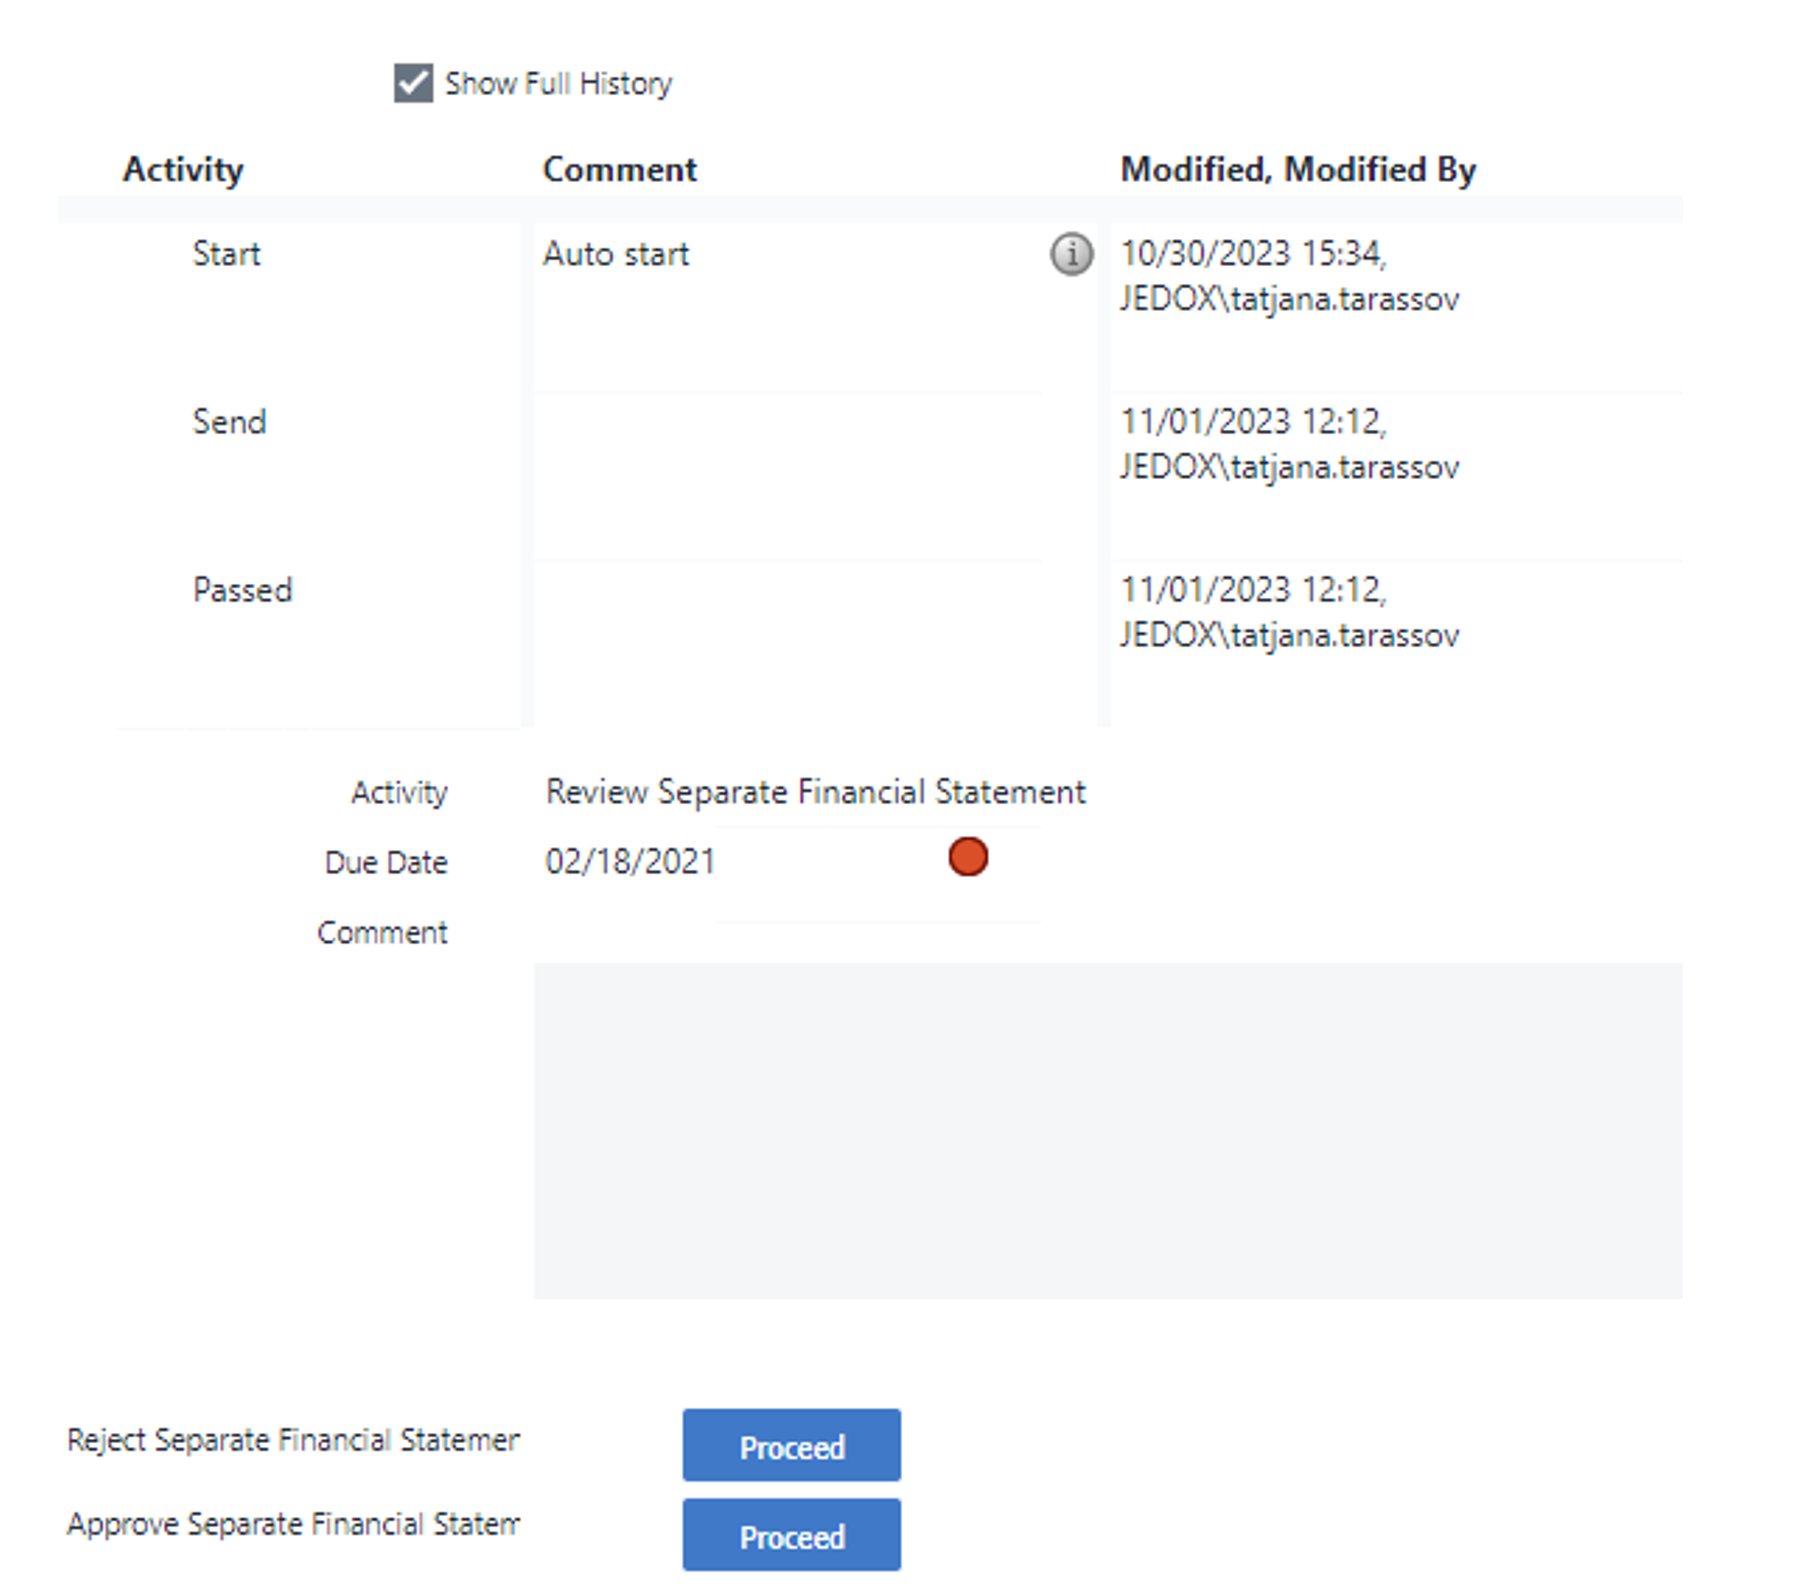
Sometimes, an approval is required. An authorized user can approve via the Workflow Details report by clicking the Proceed button next to the approval activity name. The activity can also be rejected and turned back to the previous activity.
-
System activities are executed automatically. To read more about different activities within the existing workflows, see the Special Features in Workflow for Financial Consolidation article.
Steps 2 – 7 are repeatedly executed until the workflow run is completed.
Successfully completed workflows are shown in the Workflow Administration report overview for each step dimension element. The screenshot below shows that workflow task Separate Financial Statement Collection Actual 2021-01 has been successfully completed for Legal Entities 13 and 90.
Updated July 21, 2025
