While the AIssisted™ Time Series Prediction Wizard makes predictions based on previous data, the AIssisted™ Driver-Based Prediction Wizard fine-tunes results by considering further variables known as drivers. A driver is any set of data that affects a target. Weather is a common driver, but it means something quite different depending on whether you are predicting bike rentals or movie theater tickets sold.
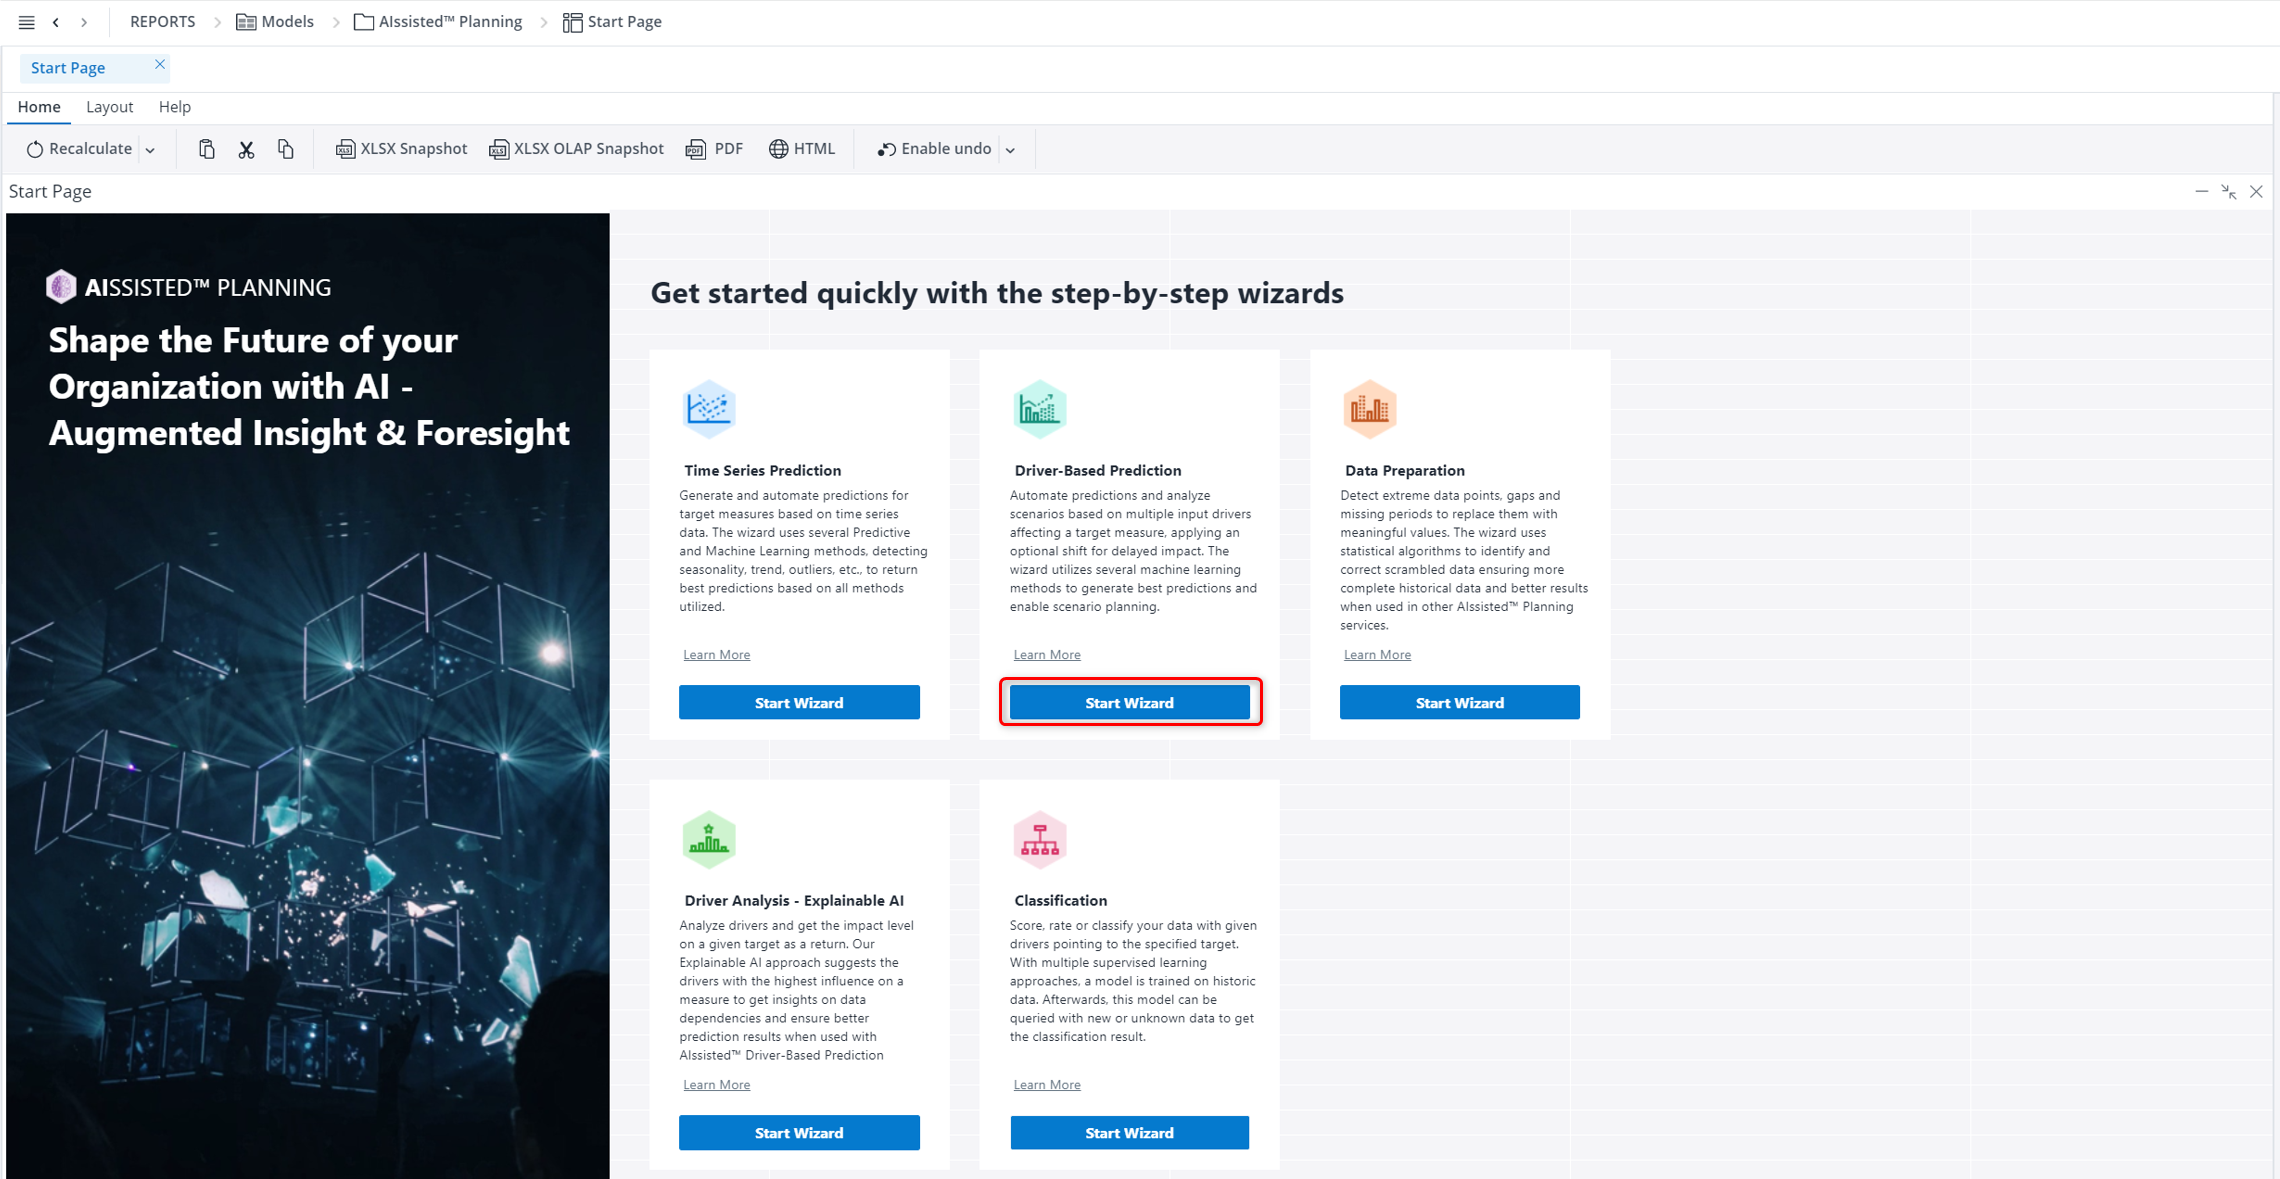
The wizard guides you through the simple, three-step process of bringing driver-based forecasting technology to your custom work environment. Start by choosing the Driver-Based Wizard from the Start Page. This will open the Driver-Based Prediction Overview.
Driver-Based Prediction Overview
The overview shows the cubes equipped with driver-based forecasting. You can also see their database and information relevant to their forecast.
On each wizard page, you will find videos and tutorials explaining each step and report.
The fields of the Driver-Based Prediction Overview are described below:
| Field | Description |
| Select Database | A dropdown of all databases stored in your Jedox instance. The database is your native work environment populated with custom data. We also provide demo data to allow you to familiarize yourself with driver analysis functionality outside of your own work environment. |
| CUBE (DB) | You may choose any cube for driver-based planning purposes, so long as it has at least three dimensions that AIssisted™ Driver-Based Prediction can utilize as the Time, Version, and Measure dimension.The database (DB) is your native work environment populated with custom data. We also provide demo data to allow you to familiarize yourself with driver-based forecasting functionality outside of your own work environment. |
| SCENARIO | Shows the saved scenarios for each cube. This can be used to create different driver-based prediction setups for the same cube. |
| ALGORITHM | AIssisted™ Driver-Based Prediction uses a number of different algorithms. Each calculates predictive output for your actual data in a unique way. The Best algorithm calculates all other algorithms and chooses the most accurate calculation. Alternatively, you can prescribe a specific algorithm (Liner Model, Random Forest, etc.). |
| LAST STARTED | Shows the last time each cube's forecast was started. |
| PREDICTIVE range | Shows the start date, end date, and duration (in months) of the time period undergoing the driver-based forecast. |
| SHOW (button) | Shows a preview of the populated data and compares the actual data with your predicted data. It also provides you with an accuracy percentage. If you choose to create an Accuracy cube, the training accuracy will also be shown in a table here. |
| START (button) | Runs driver-based forecasting for your cube. |
| COPY (button) | Allows you to copy an existing scenario by selecting it from the list of the "Copy Scenario" dialog, or add a new scenario, which will then appear in the "Scenario" list for selection. Click the Save Changes button to confirm the task. |
| EDIT (button) | Allows you to adjust the input data of the cube (e.g. change the predictive range, use a different algorithm, or choose different dimensions/elements). |
| REMOVE (button) | Removes the AIssisted™ driver-based scenario and/or prediction values for the cube. Removing only the scenario will allow you to keep prediction values, while removing values will keep the scenario intact. You may also remove both. Click Close in the window once you are finished. |
| SCHEDULE (icon) | Shows a clock icon if the scenario has the scheduled option checked. Click on EDIT to change this option or go to Jedox’s Scheduler section to edit the frequency of the analysis. |
| STATUS (button) | Displays the status of the Integrator job after you start it. To see eventual changes, click the refresh icon in the "Status" column. Once finished, it will show a different icon with the results. Click on the icon for more information. |
| New Setup (button) | Adds AIssisted™ driver-based scenario for a cube. |
| Manual Settings (button) | Used to change driver-based setups and scenarios without entering the wizard itself. Read more about it in Manual Settings for AIssisted™ Planning. |
Click New Setup to classify a predictive forecast. The wizard will guide you through the necessary steps.
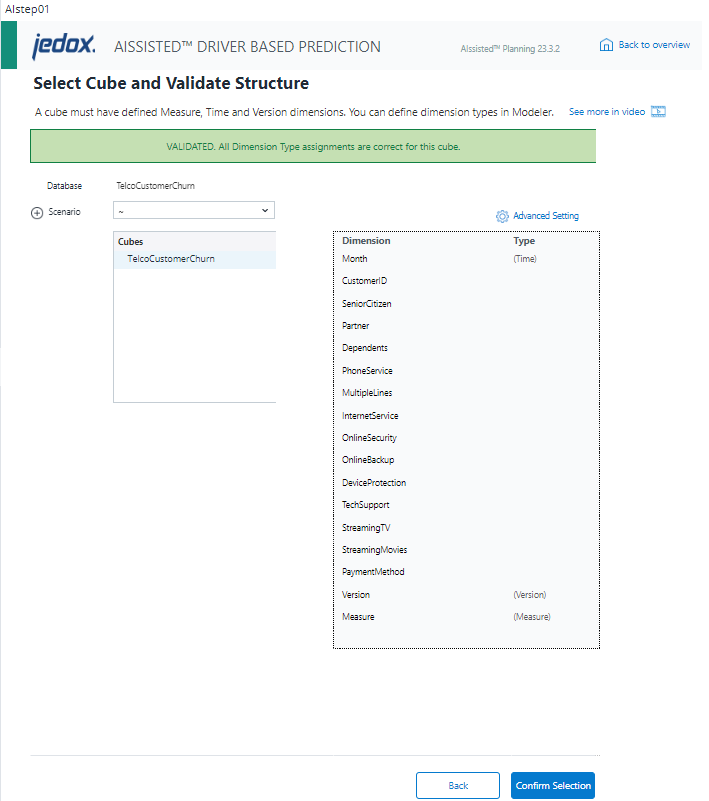
The selected database is shown along with a dropdown menu of scenarios and a list of available cubes stored within the database.
The "Cubes" list allows you to choose the particular cube on which you would like to perform driver-based prediction. The selection will indicate with a green or red message box whether the selected cube is validated for the analysis, i.e., whether it has the required dimensions. A validated cube must have a Time dimension, a Version dimension, and a Measure dimension. Click the Advanced Setting button to access the dimension type assignments.
It is recommended to not use dimensions that contain special characters in their names (e.g. , / $), as these can cause problems when using the wizard.
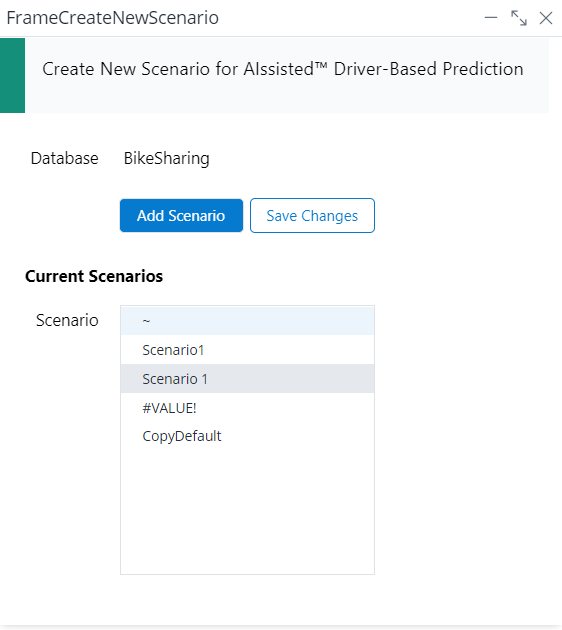
The "Scenario" combobox gives you the option to save more than one setup per cube. Select your scenario from the dropdown menu or click the + to open the "Create New Scenario" dialog. There you can add a new scenario, which will then appear in the "Scenario" list for selection. Click the Save Changes button to confirm the task.
Once you have selected a validated cube, click Confirm Selection and then click Next.
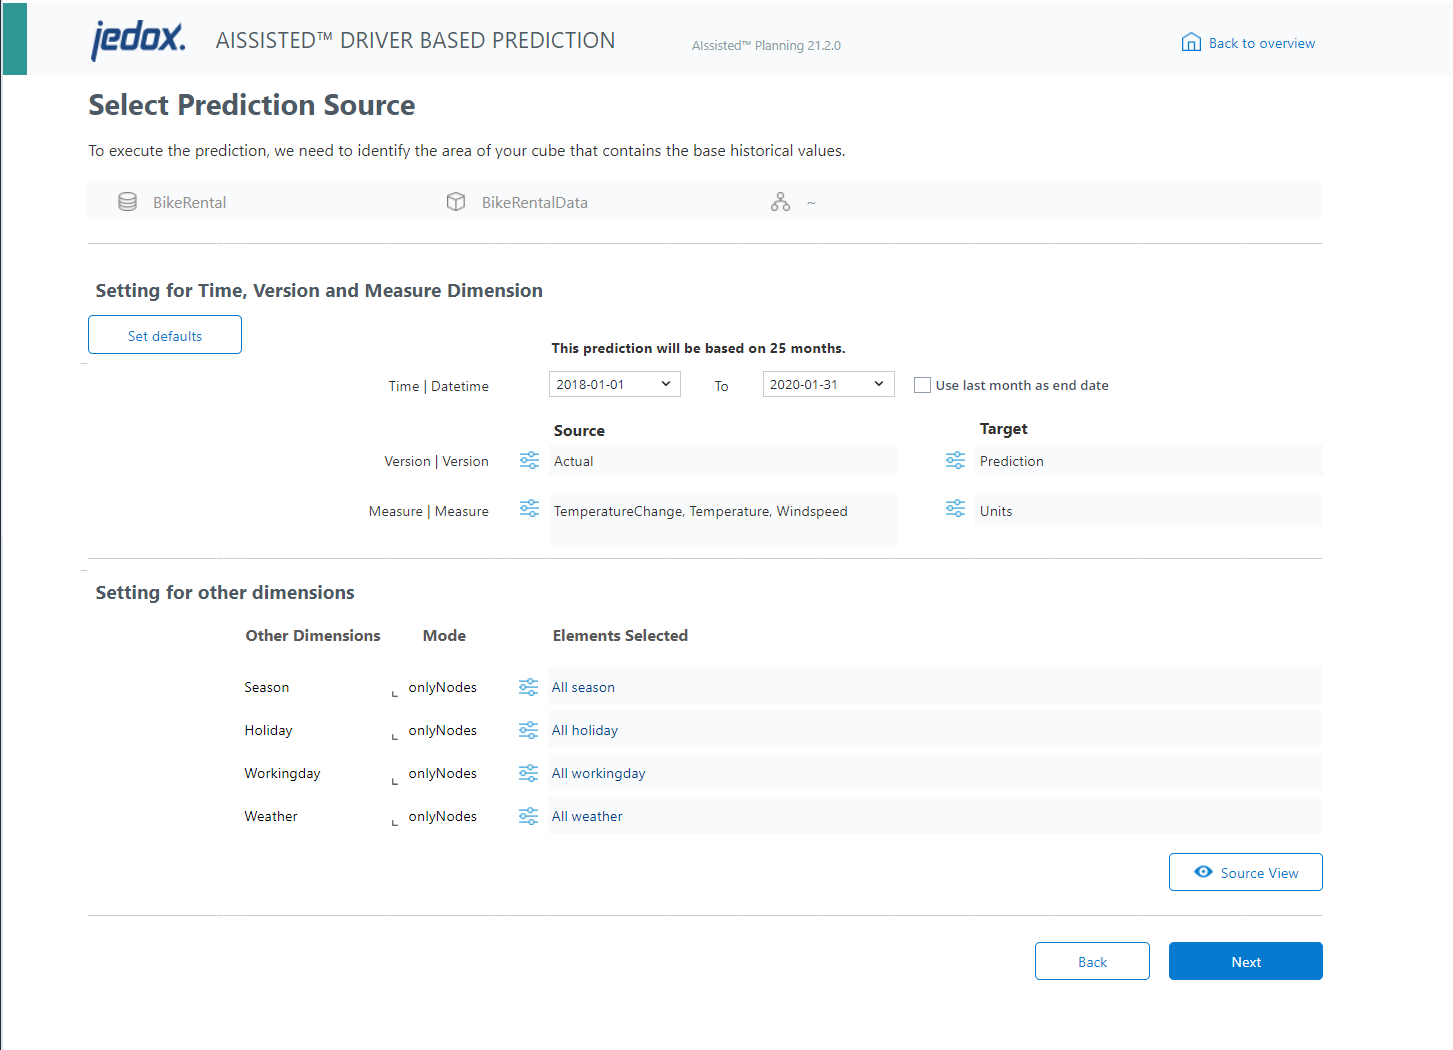
You have selected your cube. Now you must narrow your selection to a specific data slice.
The essential components of this slice are the Time, Version, and Measure dimensions, located in the upper portion of the wizard. You must pick more than one Measure dimension (please allow a slight pause between selections). Unlike the AIssisted™ Time Series Prediction Wizard, the AIssisted™ Driver-Based Prediction Wizard has both a source measure and a target measure. The source measure is the driver, and the target measure is the data to which the driver points.
You can select your drivers by clicking on the adjustment icon (![]() ) next to the
) next to the Source Measure dimension and choosing the elements you want to set, with a short pause after your final selection. You must pick at least two different measures, but you may indicate more as you like, e.g. Weather, Temperature, and Windspeed.
The Other Dimensions, found in the lower portion, will further fine-tune your prediction. More exact specifications make your data slice smaller and may result in more accurate predictions. The Set defaults button dynamically selects the first and last date elements as well as the topmost elements for additional dimensions.
You may, of course, also select your source material manually. Simply select the start and end Time dimensions from the comboboxes, being sure to choose the time level at which your data resides. For example, if your data is daily, choose a daily date, e.g. 2021-01-01. If you would like to schedule your predictions to run on a certain interval with the newest data, click the checkbox “Use last month as end date”. Then click the adjustment icons to pick the rest of your source material, which can include multiple elements per dimension, with the exception of the Time dimensions.
The mode setting for other dimensions has two options: onlyNodes and onlyBases. This sets whether the algorithms will use data at the consolidated (node) level or at the base level. If the mode is set to onlyNodes, the prediction results will be splashed down to the base level using the same distribution as the last period of actual data. When choosing onlyBases, consider how many base level elements each of your consolidated elements has. If an element has 3000 base level elements, choosing onlyBases may cause the volume to be too large, which might cause the setup to fail. It is recommended to break the setup into several different scenarios.
When analyzing data, onlyNodes uses exactly the elements you specified for the prediction. For example, if you specify "All Regions" in the Region dimension, a time series from the consolidated element "All Regions" is used as the source data. In contrast, using onlyBases causes the prediction to be calculated for each base element under the selected (consolidated) element. For example, if you select "All Regions" and under this consolidated element are the children Germany, Austria, and Switzerland, these three base level elements would then be used as the source data. The results are calculated for these three time series and then written back to these three time series. Since the inputs for the two methods are different, the resulting outputs would also be different.
Because using data at the base level may result in extreme quantities of data used in predictions and long wait times for prediction results, the wizard limits the number of dimensions that can be set by onlyBases. If more than one dimension is chosen, an error will appear when trying to move on.
If you are sure you would like to use base level data for more than one dimension, this can be set manually in the Manual Settings report. However, it is recommended that first the predictions be run with the onlyNodes mode.
If you add more dimensions with the onlyBases option using the "Manual Settings" report, be aware that this is an advanced use-case with several aspects to consider:
- The amount of data may cause your predictions to take a long time
- The data could be sparse and cause the predictions to fail or perform poorly
- Predictions at this level may also blow up the cube's volume
The Source View button allows you to view the source data before going through the prediction process. After entering your parameters, click on this button, and a preview window will pop up, showing how the source data looks. In case of gaps or extreme values, it can be helpful to use the AIssisted™ Data Preparation Wizard.
If you are satisfied with the data, just close the Preview Source window. When you are finished selecting your prediction source, click Next.
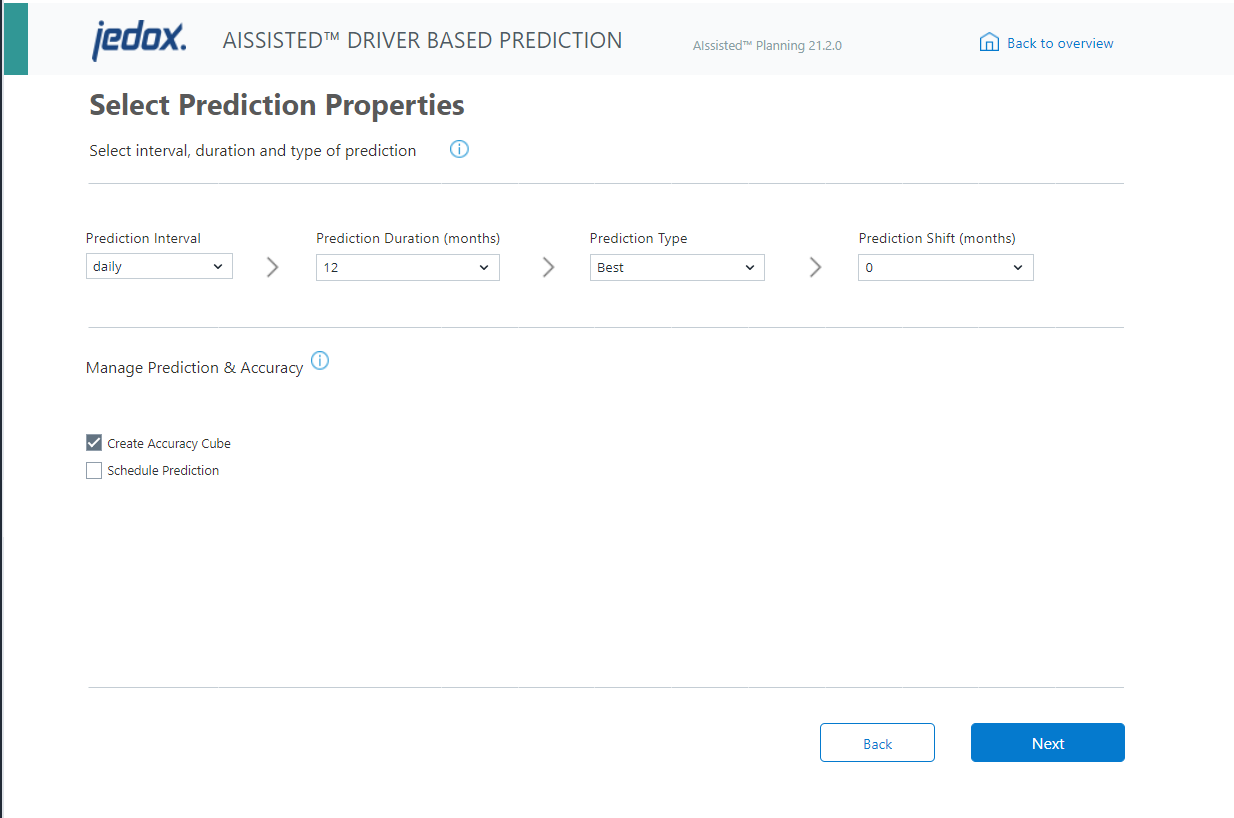
Now you must select the prediction properties, namely the duration and type.
You can choose to have monthly data or daily data (only select if daily data is available in the cube) for your prediction intervals and a predictive duration of 1-24 months. There are various prediction types, each with different algorithms. Simply hover over the info icon after selecting an algorithm for more information. The Best Selection prediction type runs all algorithms and selects the one that is the most accurate.
Prediction Shift allows for delayed drivers. While many drivers have a direct impact (such as Weather), others take time before realizing their impact. If you hire new salespeople, it may take three months of training before they affect sales. In this case, you would set the Prediction Shift to 3 months.
Select the checkboxes to apply either of our predictive management tools. The Accuracy cube stores the training accuracy of the prediction for the chosen algorithm. When Best Selection type is selected, the accuracy values for all algorithms are stored in the Accuracy cube and the algorithm with the highest accuracy is chosen. This table can be viewed in the results preview. Schedule Prediction automates a new prediction for a set interval. It will refresh your prediction along with incoming data at a set frequency. Using the checkbox in Step 2, the scheduled job will always use the latest data. The default frequency is once per day, but you can customize the length of your prediction intervals in the Scheduler.
Once you have selected your prediction properties and chosen the predictive management you wish to incorporate, click Next.
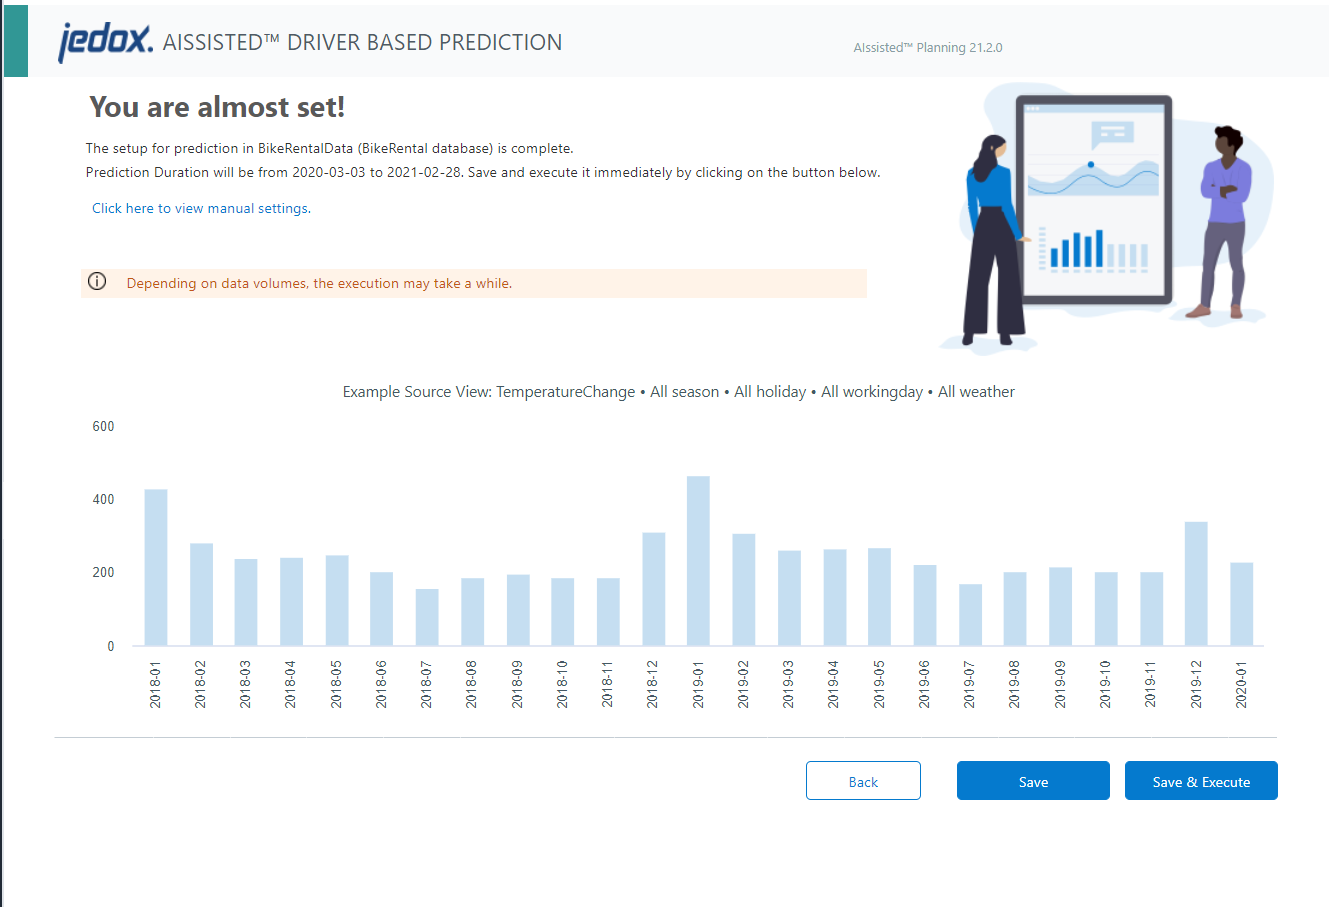
Here you see a summary of your setup and a small preview of your source data. You may now save and execute the driver-based prediction or simply save your prediction settings. Click Back to make edits. Your forecast for this data set will now appear in the overview. Here it can be viewed, modified, and executed at any future point.
Once executed, the data automatically becomes available in the cube and can be implemented in reports and templates.
Updated November 27, 2025
