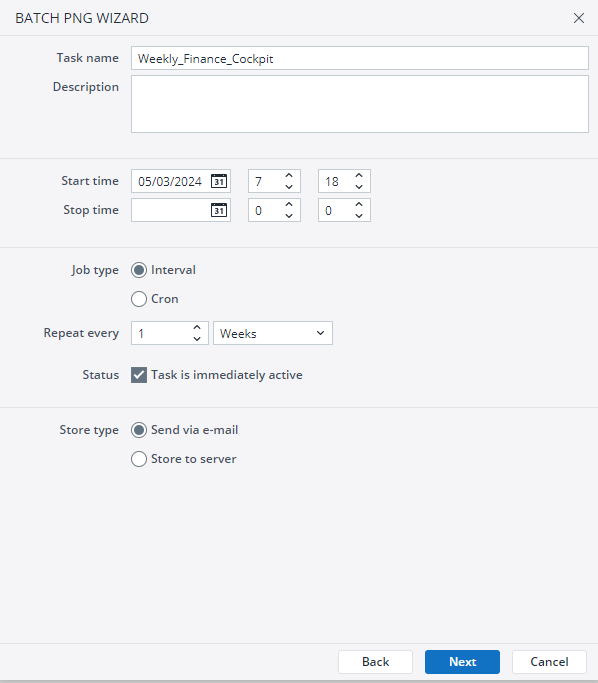
The following example shows how to create the task “Weekly report as PNG” as batch PNG.
- In Jedox Web, go to Demo Reports > Bikers Best > Reporting and select the folder “Executive reports”.
- Right-click on the folder and select “Batch PNG”.
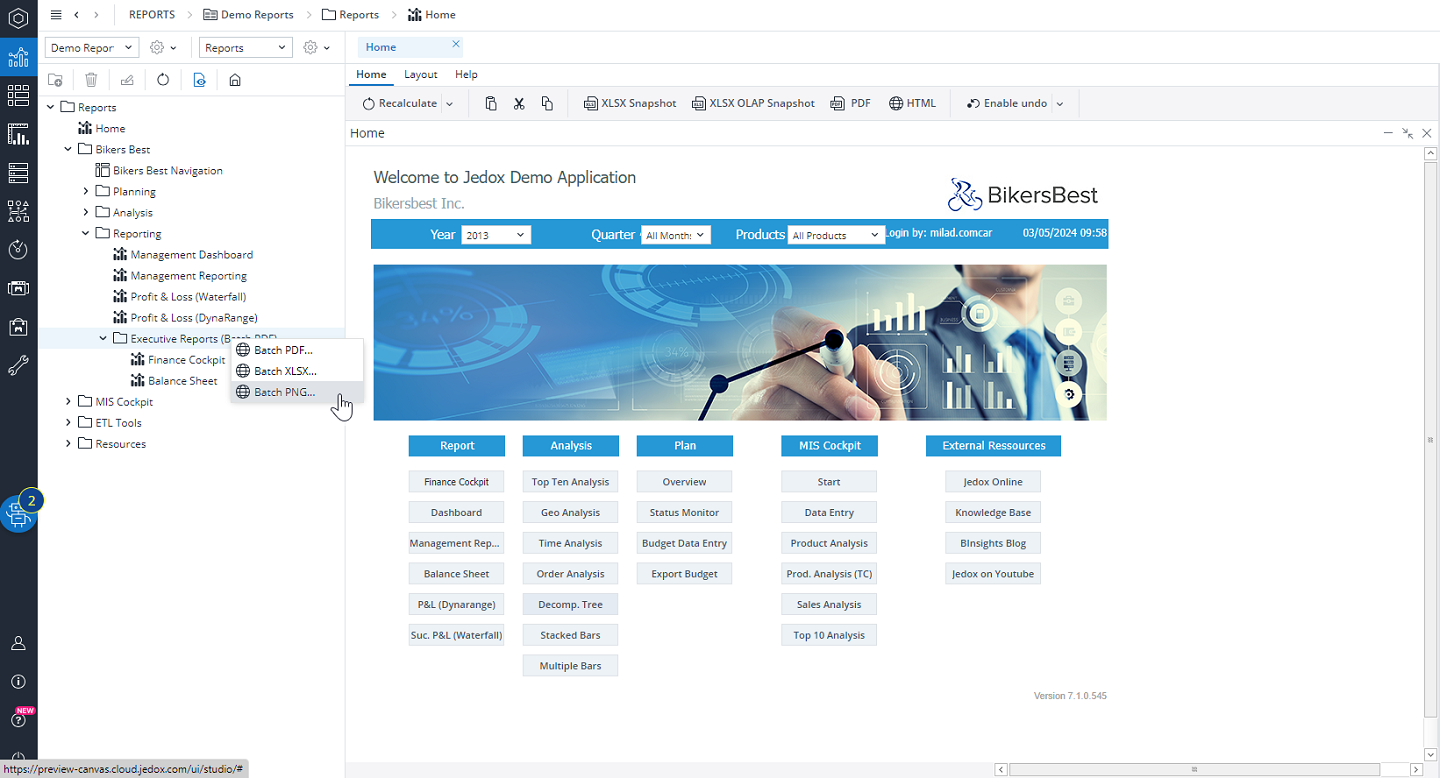
- The Batch PNG Wizard opens:
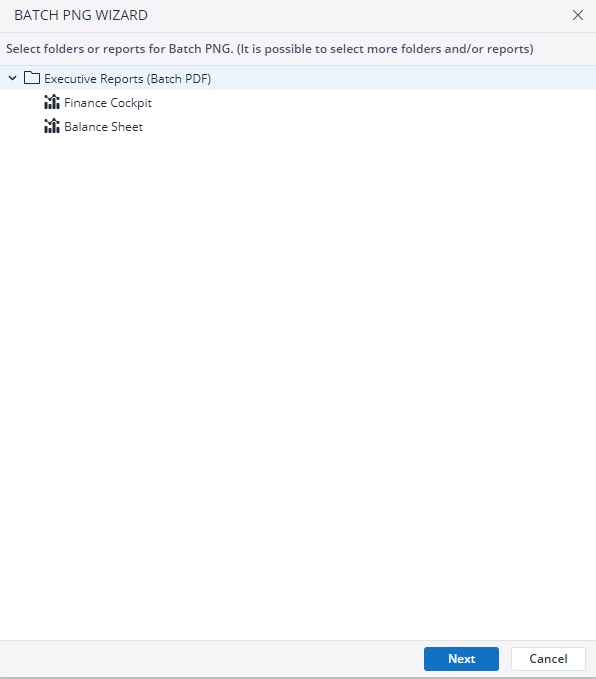
Select the desired PNG reports by holding down the CTRL key. For this example, choose only “Finance Cockpit”.
Click Next. - Select the variables and/or the values that you want to use for PNG creation. The following options are available:
Quick Varset – allows you to select them from a series of predefined options.
Private Varsets – allows you to save a selection just for yourself.
Global Varsets – allows you to save a selection for all users.
The existing Global Varset “Annual Report” selects “All Values”. Select sel_year (Finance Cockpit) and the years 2014, 2015 and 2016: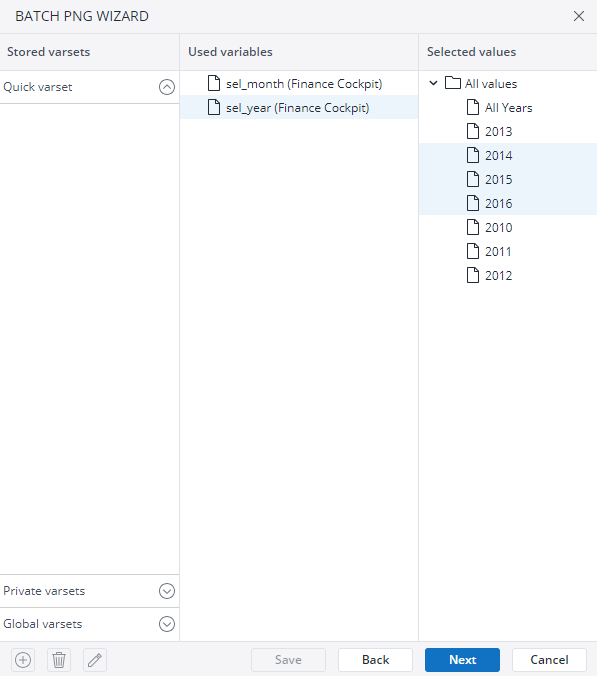
Click the icon on the lower left and give your varset a name, for example, 14_16, to save the selection. Click Next.
Notes:
The variables are available in the Batch PNG Wizard only after you set a variable type in Reports > Designer Mode > variables. For more information about creating reports with • • variables, see Example: Report with Variables. For more information about variables, see Variable Mapping.
• Note that if you select a folder, all the reports in it will be printed as PNGs. - Set the sorting order. You can sort by report if you select “Group by Report”, or by variable set if you click “Group by Varset”. Click Next.
- Select the “Task generation” option.

- If needed, set up the restrictions and password. Click Next.
Note that only if you assign a password for opening a document, the option “No Restrictions Password” is active. If the document is open using that password, the assigned PNG restrictions are not effective. - Give the task a name and a description. Select the trigger and store type. For more information, see Trigger Types and Store Types.Note: the start/stop times are applied in the time zone that the server is in. This time zone may be different from that of the user who is scheduling the task.
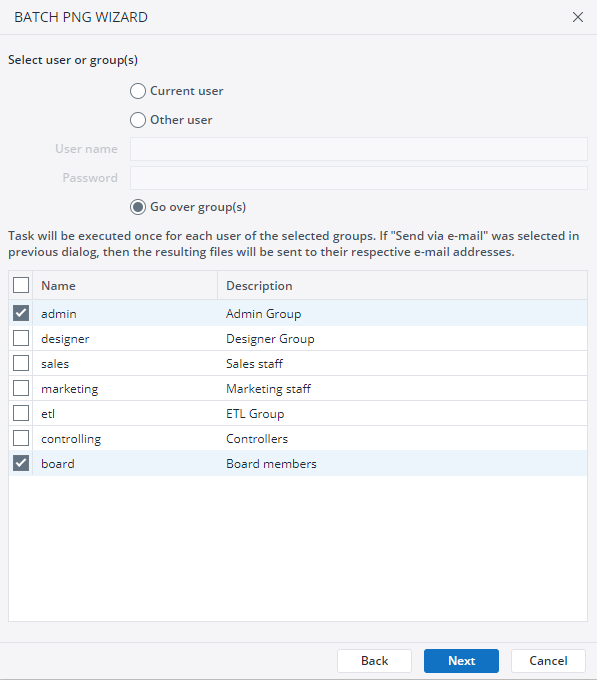
For example, say a Jedox server is physically located in Bucharest (UTC+2). It serves a company located in Berlin (UTC+1). If a user in Berlin schedules a task to begin at 18:00, the task will begin at 18:00 in Bucharest (which would be 17:00 in Berlin). For more information, see Time Zones in Jedox. - Select the users for which the task should be executed. If you want to send reports to each user of a certain group, use the option “Go over group(s)” and select the user group you want.
Results
Send via e-mail
All the users who executed the task receive an e-mail with the PNG attached. In this case, the created PNGs are not stored on the server. These e-mails are configurable in the Scheduler and can be different for every task. For more information, see Configuring and using e-mail templates in the Scheduler.
Store to server
The PNGs can be stored in the Report Designer in Jedox Web. For the results below, the option “Go Over Groups” with the group “admin” is selected. Click Refresh to actualize the screen with the created PNGs.
Updated July 21, 2025
