Jedox comes with a Demo database that you can use to quickly create a Jedox Database View.
Creating a Jedox Database View
- Open a blank Excel workbook;
- Select the command "New View" in the Jedox Ribbon. This command allows you to easily create Jedox database views on a worksheet.
- In the dialog box, select which dimensions and elements you want to see and how they should be arranged;
- With drag and drop, move the dimensions from the page area (current location) to the row titles or column titles areas:
- Move the dimension "Products" to the row titles area and the dimension "Regions" to the column titles area.
Pasting and Changing a View
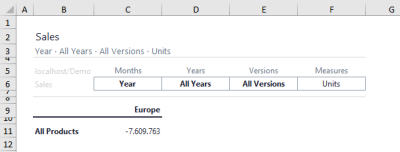
- Click the "Paste" button. You will get the following View (the value in C11 may differ, depending on the stored demo database values of the current installation):
- By using the following techniques you can easily change the View:
Double-click B11: Expands rows.
Double-click C9: Expands columns.
You can change the element of the Month, Years, Versions, and Measures header dimensions by double-clicking on C6, D6, E6, or F6:
A more detailed description of the Paste View Dialog in Excel Add-in you can find here.
Updated May 17, 2024


