To publish and to store Excel files in Jedox Web or to load Jedox Spreadsheets from Jedox Web in Excel, a valid, active connection to the Jedox OLAP server is required. It is also required to use some dialogs and features from Jedox Web, such as Modeler. The connection requires the following items:
- A valid URL connection with a port specification.
- Valid authentication credentials (such as username / password or Windows Authentication).
- The connection must be set as the active connection.
Connection parameters for the add-in are established by clicking on Jedox Wizard in the Jedox ribbon, indicated below.
With a client / server installation, only the user who is logged in during the installation will be registered with the Jedox OLAP server. Other users must register once they connect to the server. Connections remain in the list until they are deleted.
Creating, editing, and deleting connections
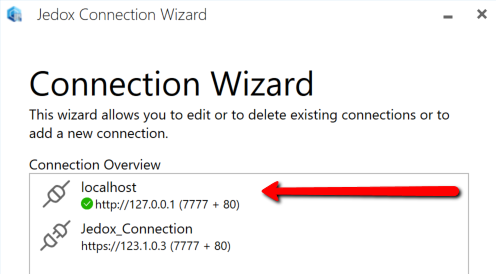
The Jedox Connection Wizard dialog lists available connections.
To add a new connection, click Add Connection.
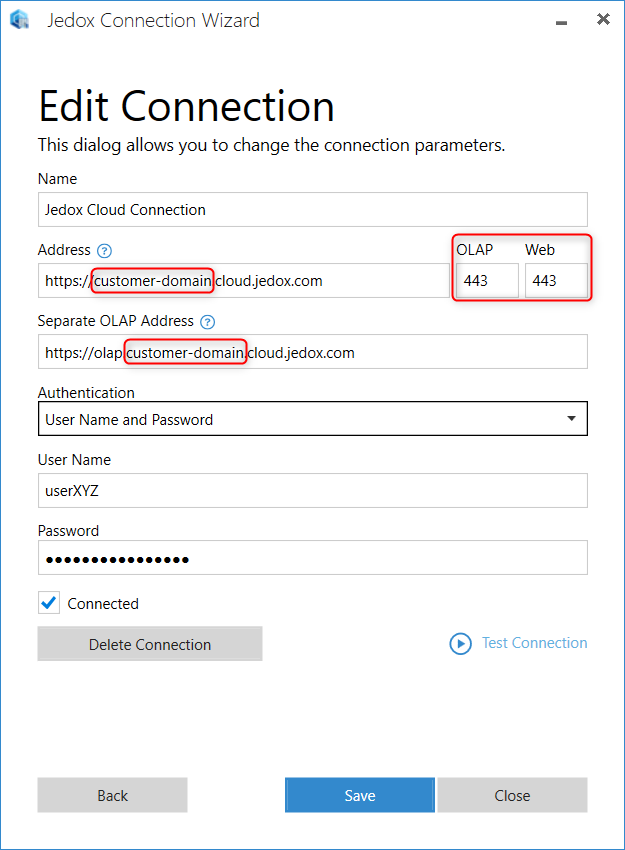
The screenshot below shows an example of the settings for a Jedox Cloud connection.
The connection details can also be obtained from the Cloud Console.
In many Jedox instances, the OLAP and Web servers are installed on the same machine. Since the address will be the same for the OLAP connection, you can leave the Separate OLAP Address field blank.
If you are accessing the OLAP server via a proxy, you can indicate the proxy server in the Separate OLAP Address field in this manner:
<target server name or ip>@<proxy name or ip>:<proxy port>
Examples:
10.0.0.1@192.168.2.110:8080
JEDOX_OLAP@192.168.2.110:8080
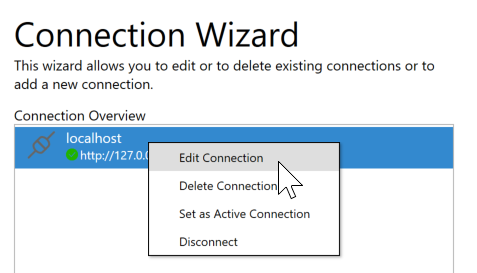
To edit or delete an existing connection, right-click on it and select an option.
Notes on Jedox connections:
- The active connection is used for several features in Excel COM Add-in, including Modeler, Import Wizard, and Data-Driven Modeling.
- In all cases where the user interface is provided by Jedox Web, the Jedox Web language setting of the active connection will be used.
- When updating from a Jedox version older than 2018.2, Excel attempts to convert existing connections. If the OLAP and Web connection have the same name (e.g. when they point to a Jedox Cloud), the Jedox Connection Wizard will merge these into a single connection. If the OLAP and Web connections have different names, the new connection will only work for the OLAP dialogs, such as Paste View, but not for the complete functionality of a Web connection, because there cannot be set an active connection to Jedox Web (see next section).
Always test the connection after making changes.
Setting the active connection
The Active Connection is indicated with a green checkmark in front of the address:
To set a connection as active, right-click on it and select the context-menu option Set as Active Connection.
For Jedox Web connections, you can define multiple connections in parallel, but for complete functionality, one of these connections must be designated as the active connection.
Changing the active Jedox Web connection
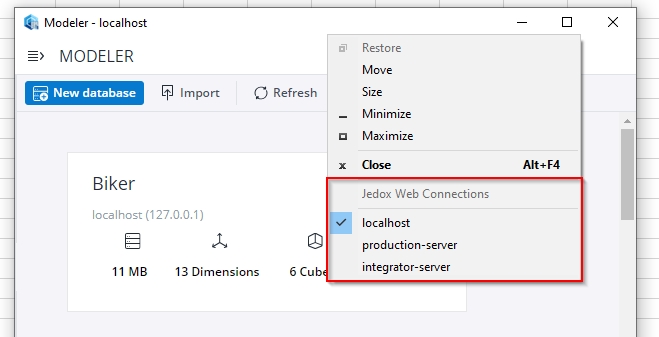
The active connection, used by the add-in dialogs that access Jedox Web, can be changed from each Web dialog directly. To change the connection, right-click in the header bar of any Web-based dialog (such as Modeler), and select the connection from the context menu. The selected connection will then be used in the opened dialog and other dialogs that access Jedox Web.
Connecting to or disconnecting from a server
There are different ways of connecting to or disconnecting from a server:
- Right-click on the connection in the Connection Wizard.
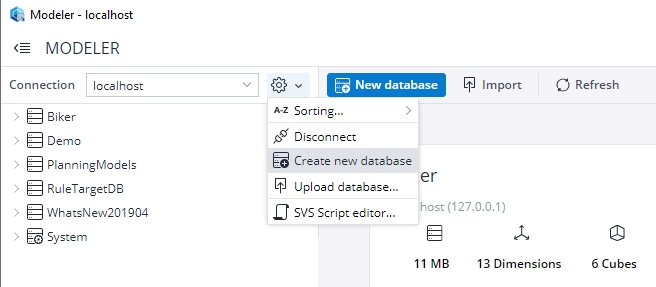
- In Web dialogs (such as Modeler or Paste View), select the connection from the Connection dropdown list and then choose an option with the cog wheel:
Setting an authentication method
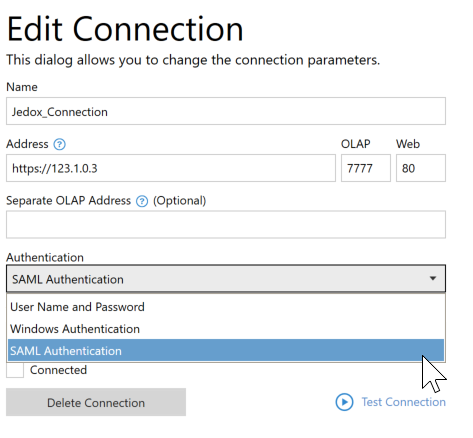
Authentication options in Jedox include username and password, Windows Authentication (SSO), and SAML. All are natively supported in Jedox. The desired option can be selected from the Authentication dropdown menu in the Edit Connection dialog, as shown below.
Updated July 21, 2025

