The Rule Editor features syntax editing of OLAP rules and rule templates, including optional auto-complete while typing. For details on rule syntax, see Business Rules Overview.

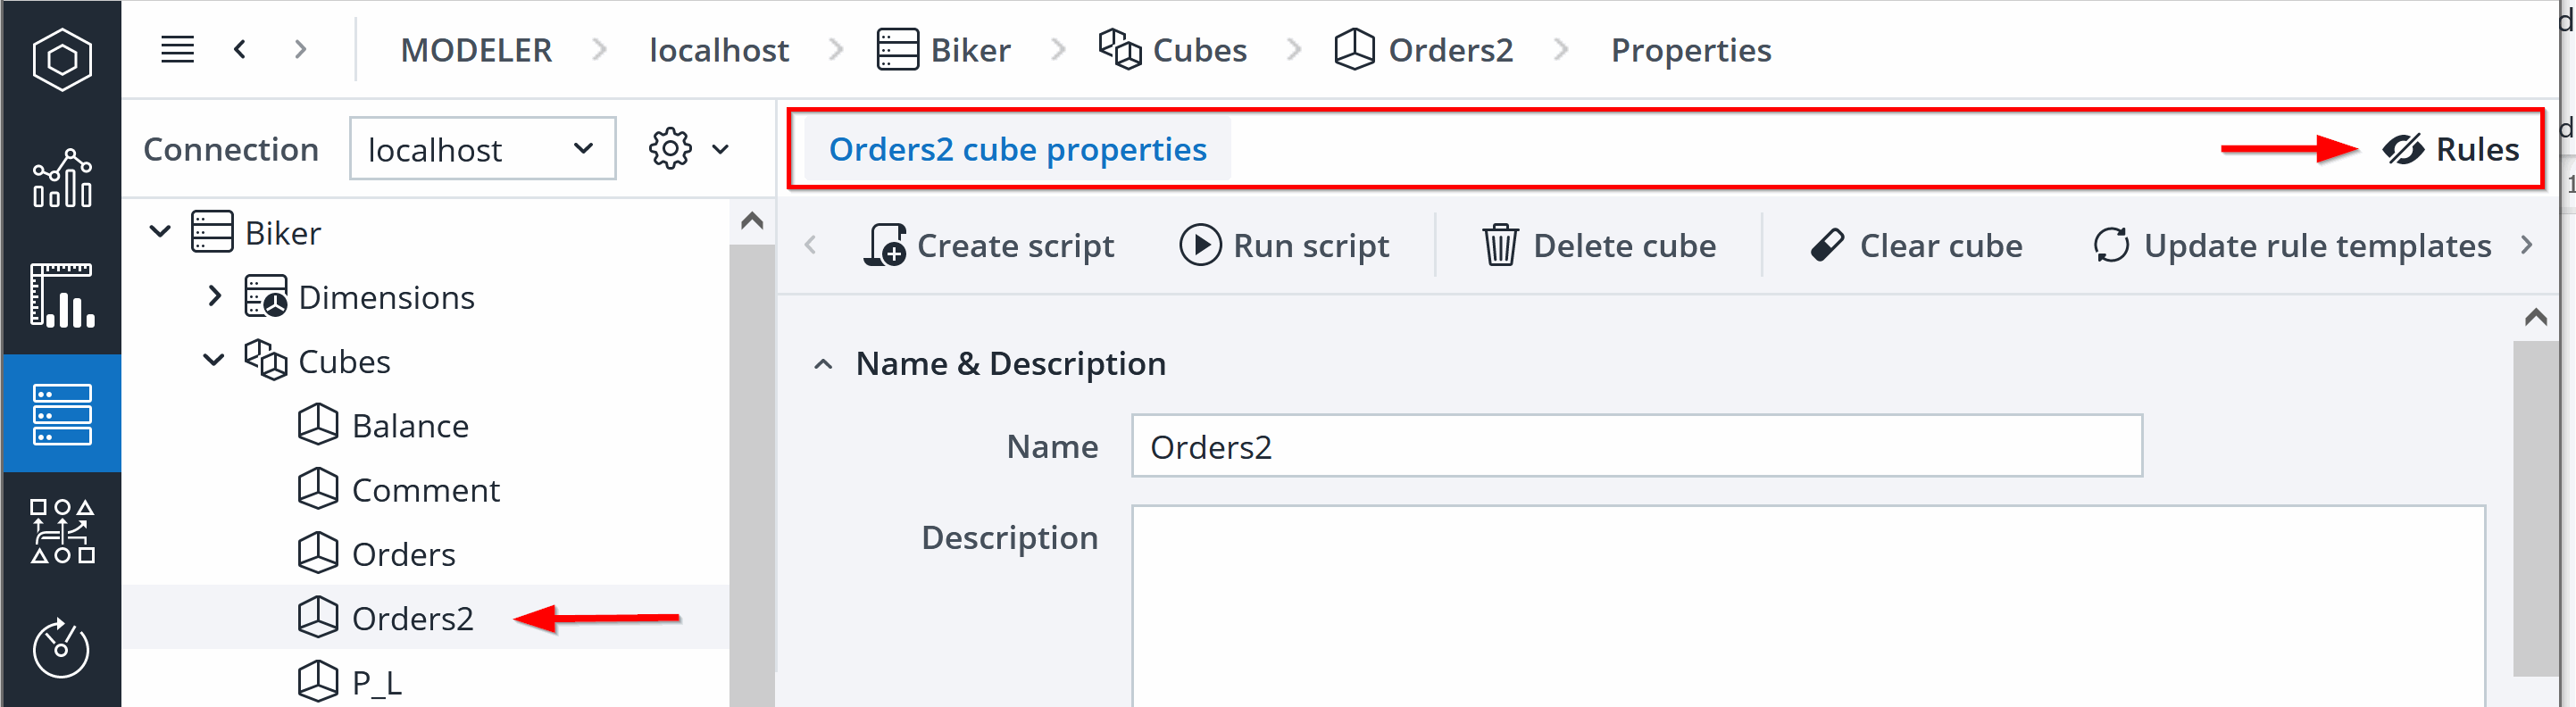
To display the All rules tab, select a cube and turn on the Rules button at the top right:
You can also right-click on the cube name in the navigation tree and select Edit rules... from the context menu. Both ways will show the All rules tab:
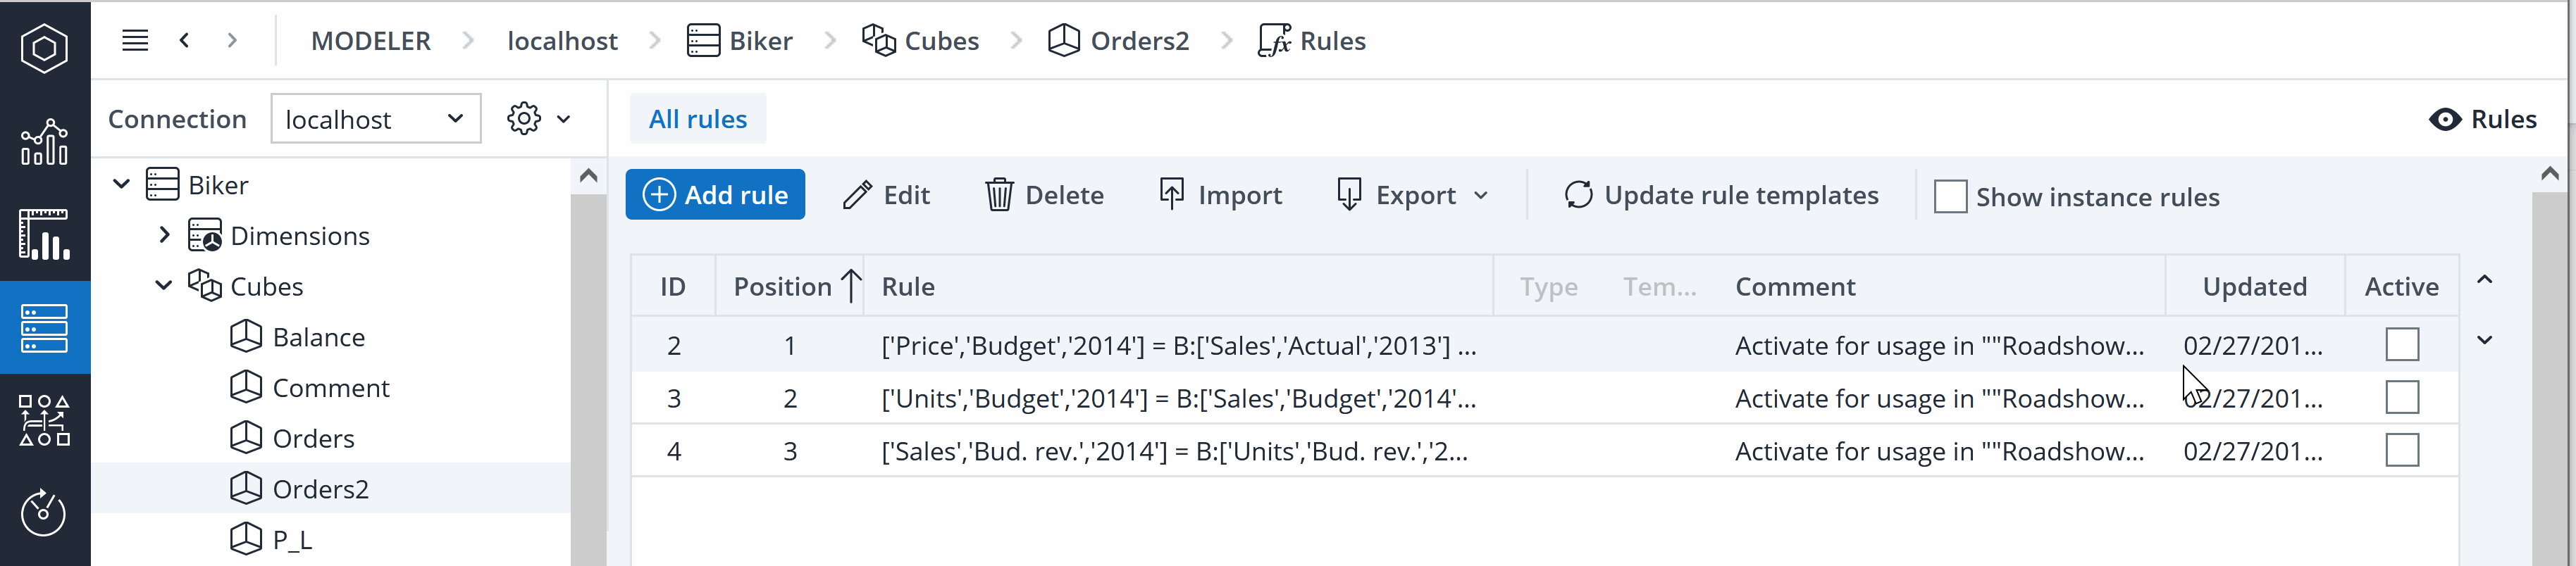
Here you can create, edit, import, export, and update rules.
To open a selected rule you can double-click on it or you can use the edit button.
The rule editor will open with following areas: Manual edit area, Comment, Query, and Rule editor with selection areas.
Last ones are descripted below:
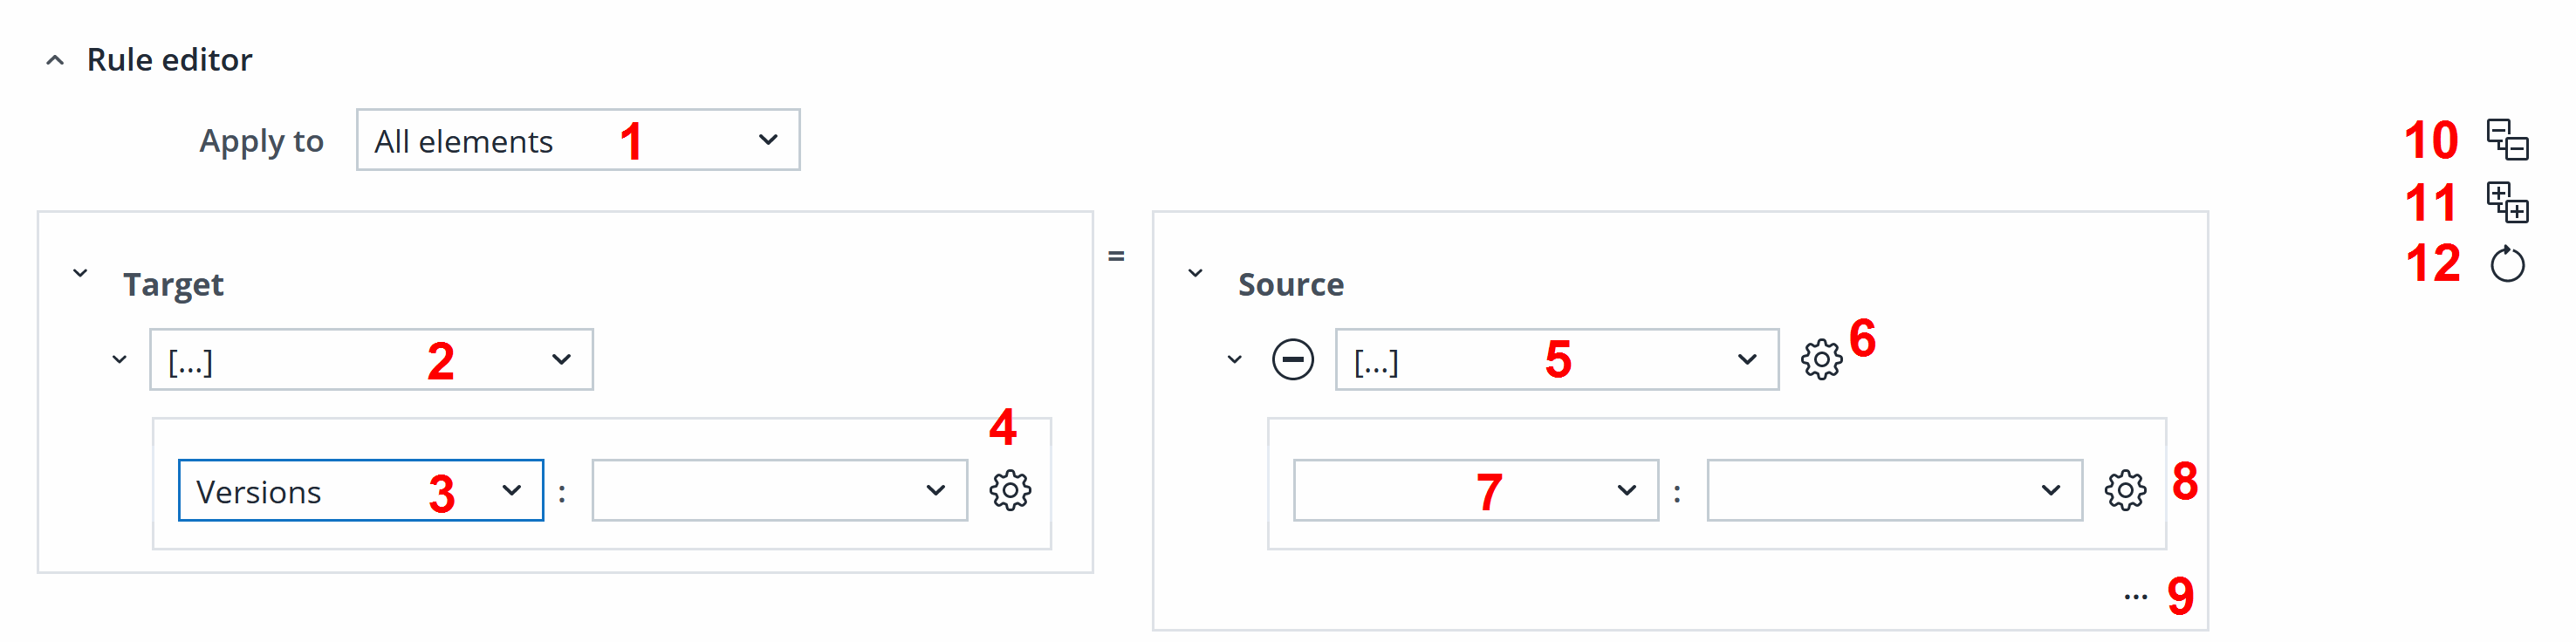
- Dropdown list to define the scope of the rule: all elements, base elements, or consolidated elements.
- Dropdown list to select the rule form.
- Dropdown list to select the target dimension.
- Gear wheel icon to select an element or element list. If Element list is selected, the display of the inner element control changes. If you then open the Select Elements dialog, selection of multiple elements is possible. The elements will be added in several controls, with the matching rule syntax. To add another element to the same dimension list, click on a gear wheel:
- Dropdown list to select the rule content, including rule functions. You can use named subsets in the Rule Editor.
- Gear wheel icon is used to set the rule type as expression or variable.
- Dropdown list shows possible source dimensions.
- Gear wheel icon is used to select an element or apply a function.
- The "three points" icon offers a selection of valid operators.
- Button to collapse all selection areas.
- Button to expand all selection areas.
- Button to refresh the selection areas.
To enable auto-completion when typing a rule formula, use the key combination CTRL + SPACE.
Changed and unsaved rules are indicated with a blue icon in front:
![]()
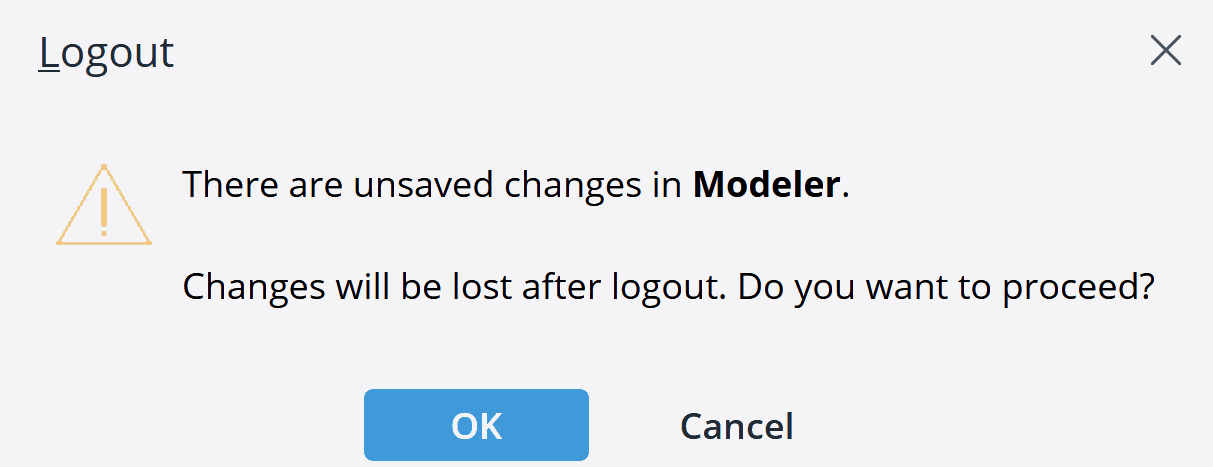
There will be no warning if you hide / quit the Rules tab(s) with unsaved changes, but the changes will be retained until you close your Jedox session. You will receive a warning for unsaved changes when you close your Jedox session:
Ordering
You can order dimensions and cubes in Rule Editor:

In places where only dimensions of a specific cube are shown, dimensions are listed by the order they have in the cube.
Importing and exporting rules
If you plan on making changes to your rules, it's a good practice to export them so you have a back up. Some users also edit rules outside of Jedox (e.g. in Excel) and then import them into Jedox.
When you click Export you can select the file format of the export: .txt or .jds (jedox script file). All rules in the selected cube will be exported in the selected file format.
Note that the .txt option will be deprecated as an import / export option in Jedox 2022.4.
Text files start with the following columns:
Definition;Comment;Query;Template;Active;Extern ID;Timestamp
When importing rules from .txt files, you are prompted with the following dialog:
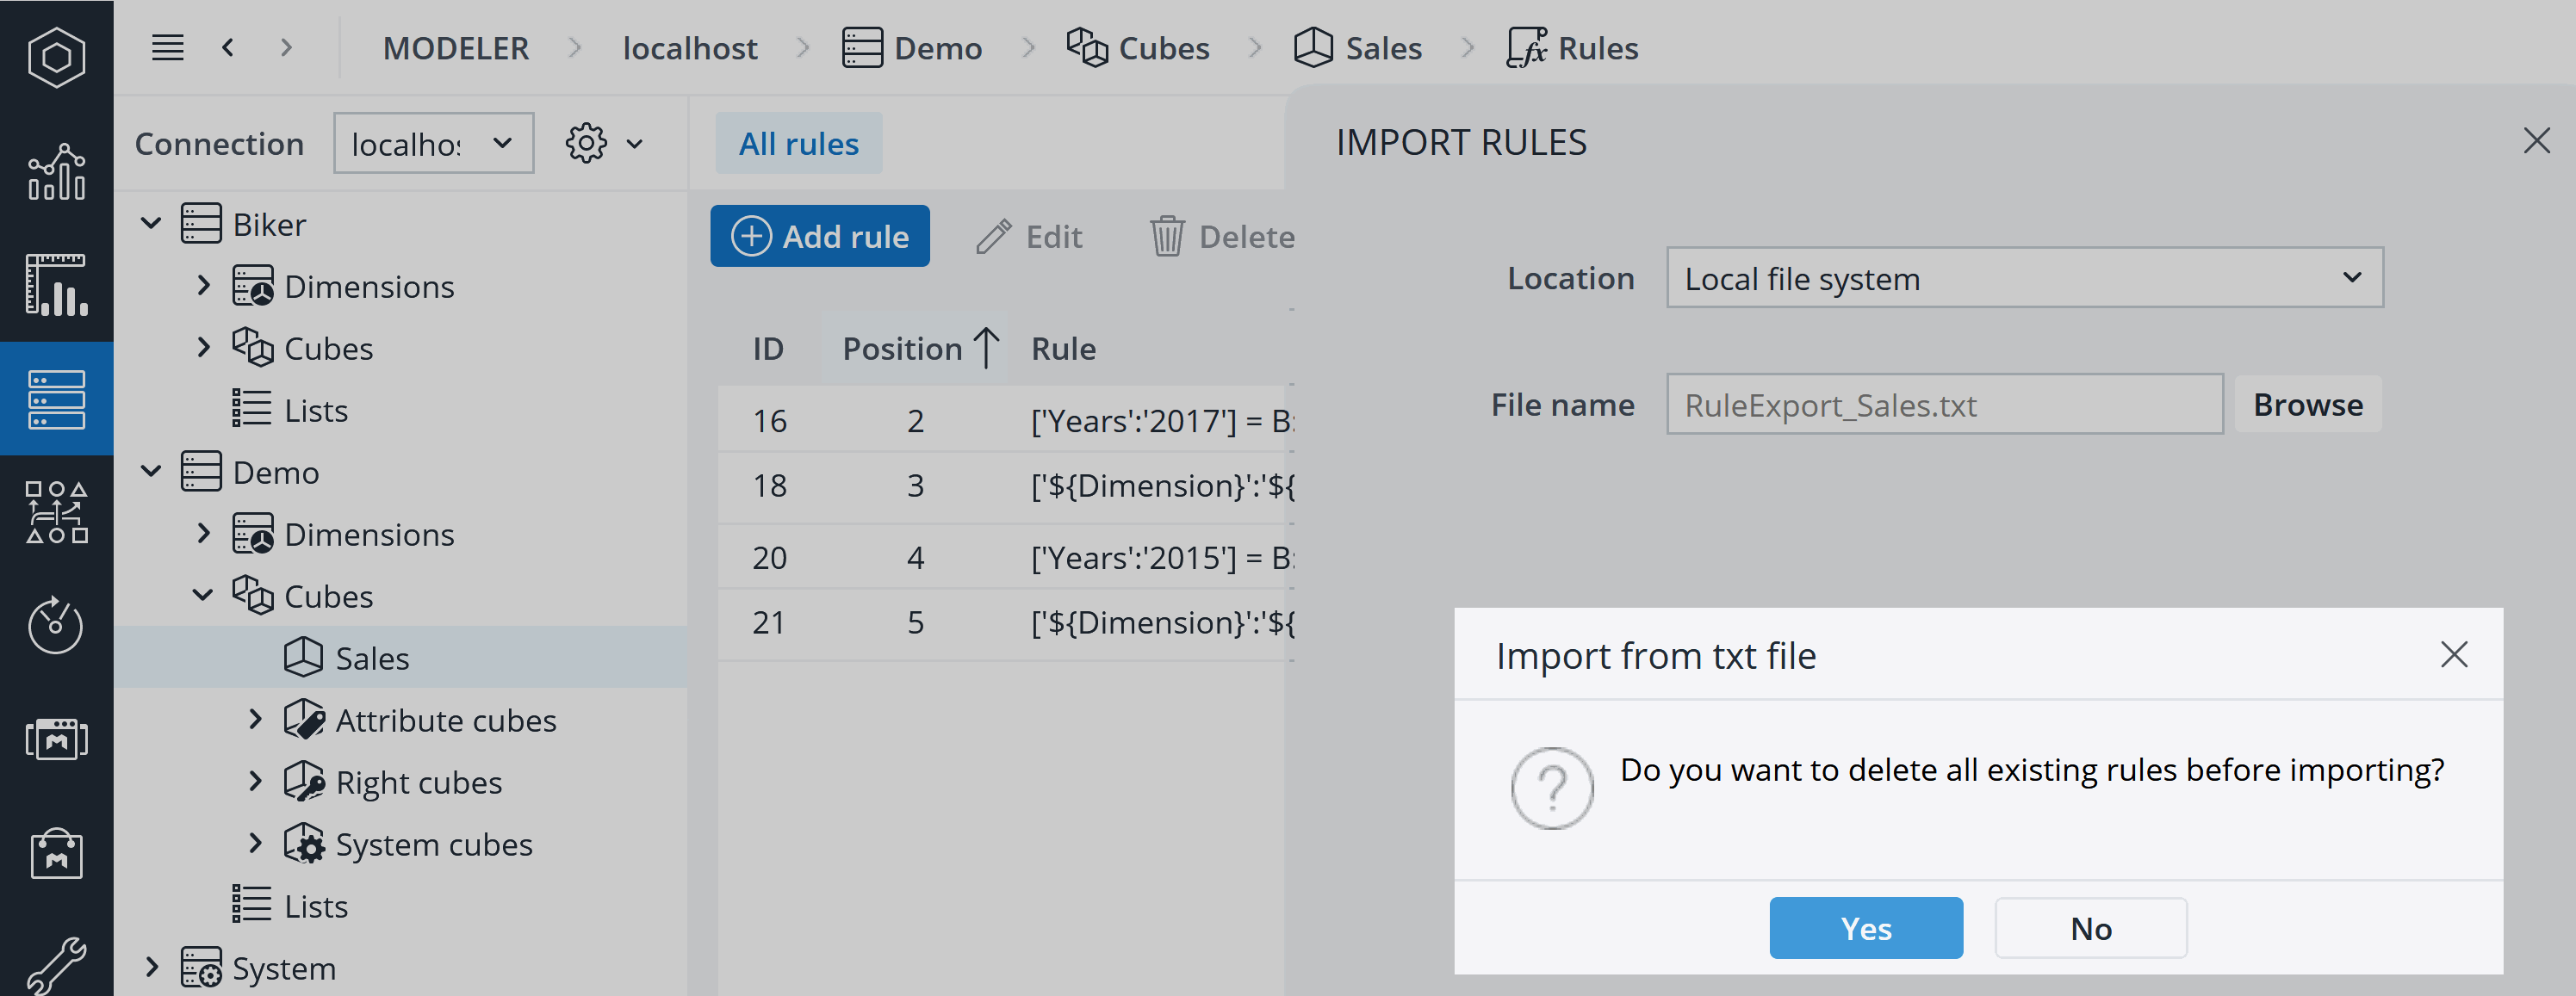
If you click Yes, then the imported rules will overwrite all existing rules in the cube. If you click No, then the imported rules will be appended to the existing rules.
When importing rules from .jds files, you are also prompted, but there is no selection how to handle existing rules: the imported rules will always be appended to the existing rules.
Updated August 28, 2023