With this centralized notification configuration service, system administrators can configure the sending of emails and notifications via SMTP for each cloud instance and for the entire company.
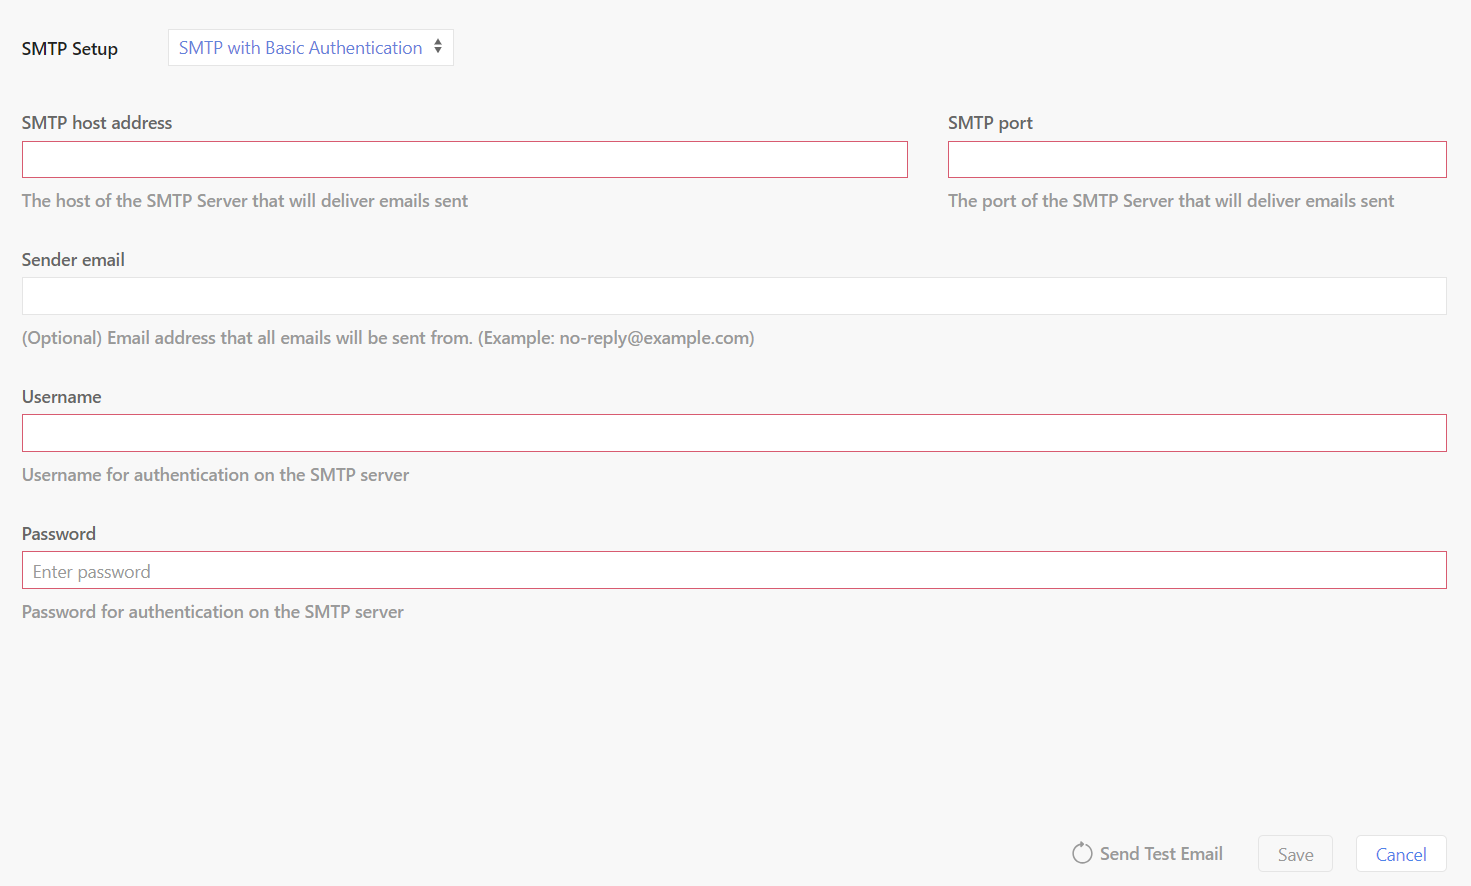
When you enable the option, a dialog with the Generic with Basic Authentication settings is displayed. Click Edit SMTP settings to add the values or change the setup.
Generic with Basic Authentication setup
- SMTP host address: enter the host of the SMTP server that will deliver the sent emails
- SMTP port: enter the port of the SMTP server that will deliver the sent emails
- The only currently supported ports for SMTP are 2525, 8025, 587, 80, and 25
- SMTPS security mode is not supported
- Sender email (optional): enter the email address all emails should be sent from (e.g. no-reply@example.com)
- User Name: enter the username for authentication on the SMTP server
- Password: enter the password for authentication on the SMTP server
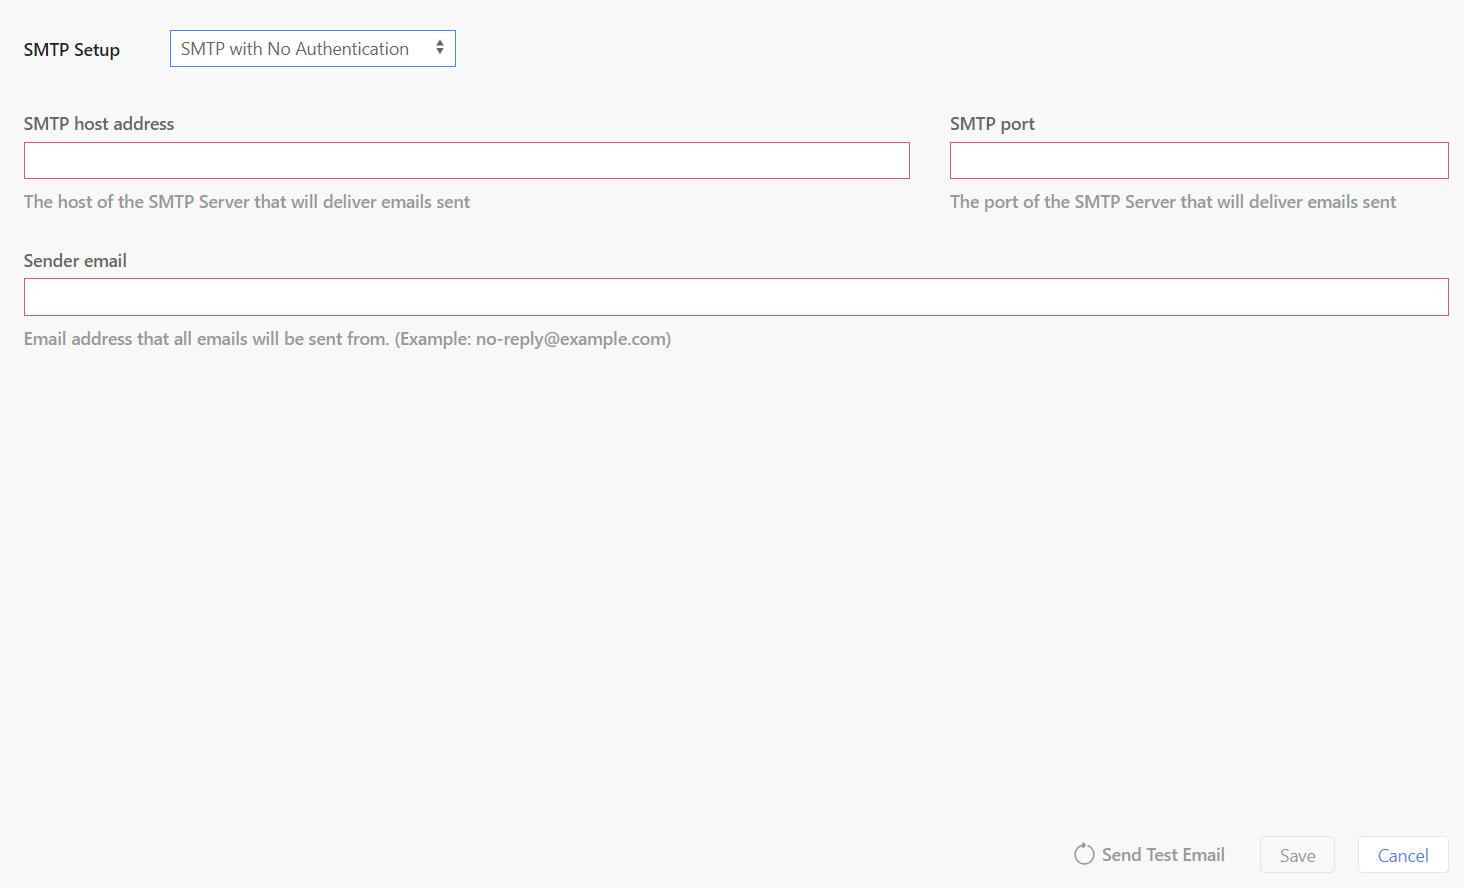
Generic with No Authentication setup
- SMTP host address: enter the host of the SMTP server that will deliver the sent emails
- SMTP port: enter the port of the SMTP server that will deliver the sent emails
- Sender email: enter the email address all emails should be sent from (e.g. no-reply@example.com)
Note that you may need to whitelist the outbound IP address on the SMTP server.
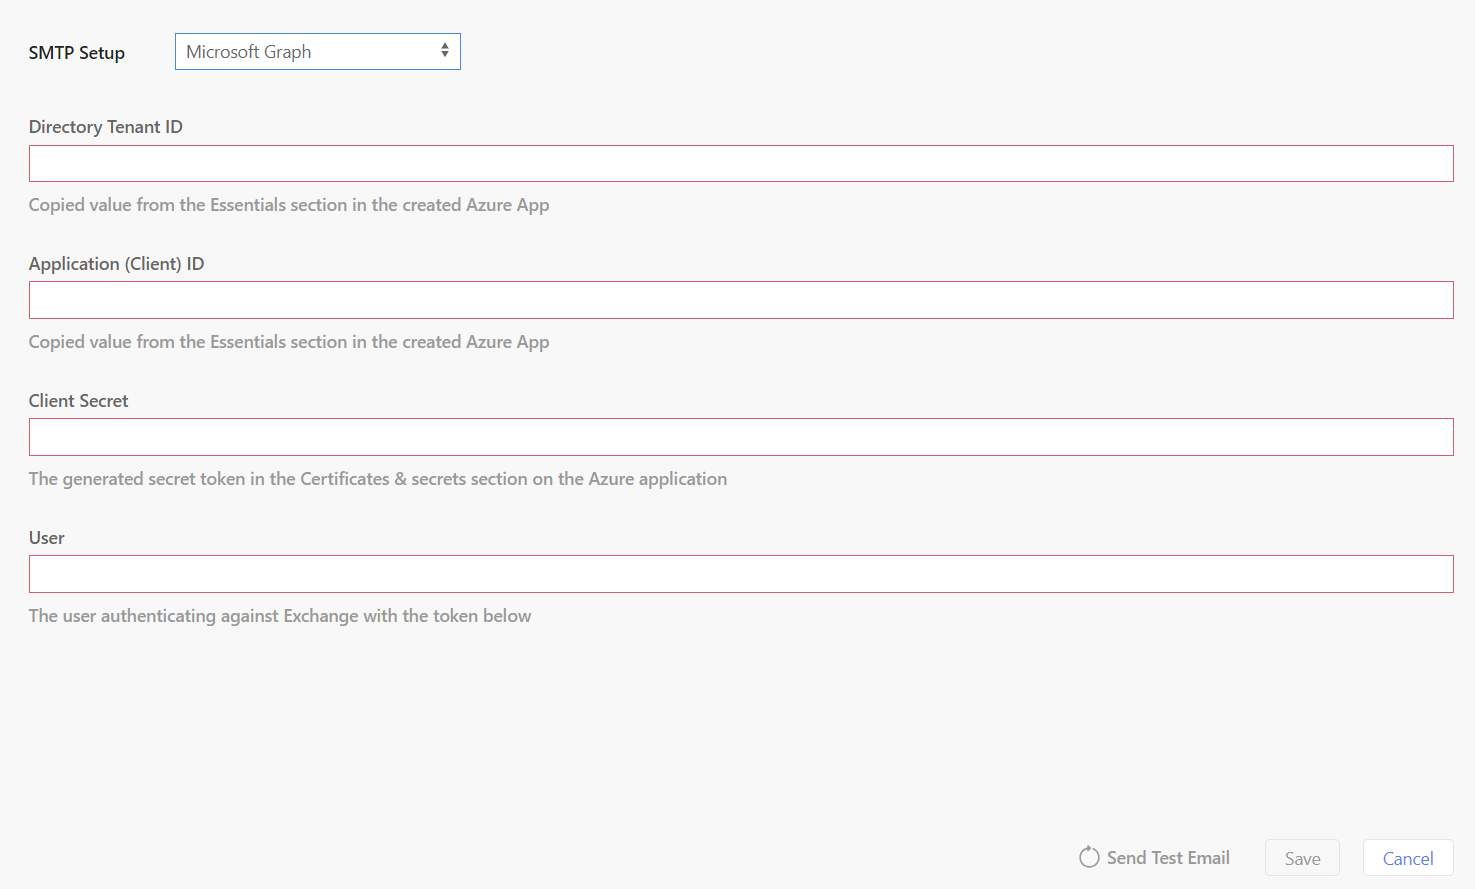
Microsoft Graph setup
To enable the authentication, you must first register your application with Azure App Registrations. See the information below on how to set up the app registration on Azure.
- Directory Tenant ID: enter the copied value from the “Essentials” section of the created Azure app
- Application (Client) ID: enter the copied value from the “Essentials” section of the created Azure app
- Client Server: enter the generated secret token in the “Certificates & Secrets” section on the Azure app
- User: enter the user authenticating against Exchange, usually this is the email address
Set up the app registration on Azure
- Log in to the Azure portal (App Registrations).
- Create an app and give it a name.
- For the supported account types, select “Accounts in this organizational directory only”.
- Leave the redirect URI empty. This field is not required.
- Write down the Directory (tenant) ID and the Application (client) ID. You will need these values for the Cloud Console setup.
- Generate a new client secret under "Certificates & secrets" in Azure. Set the validity period and make sure that the certificate is updated before it expires. Write down the value of the client secret you have just created, as it will be hidden afterward.
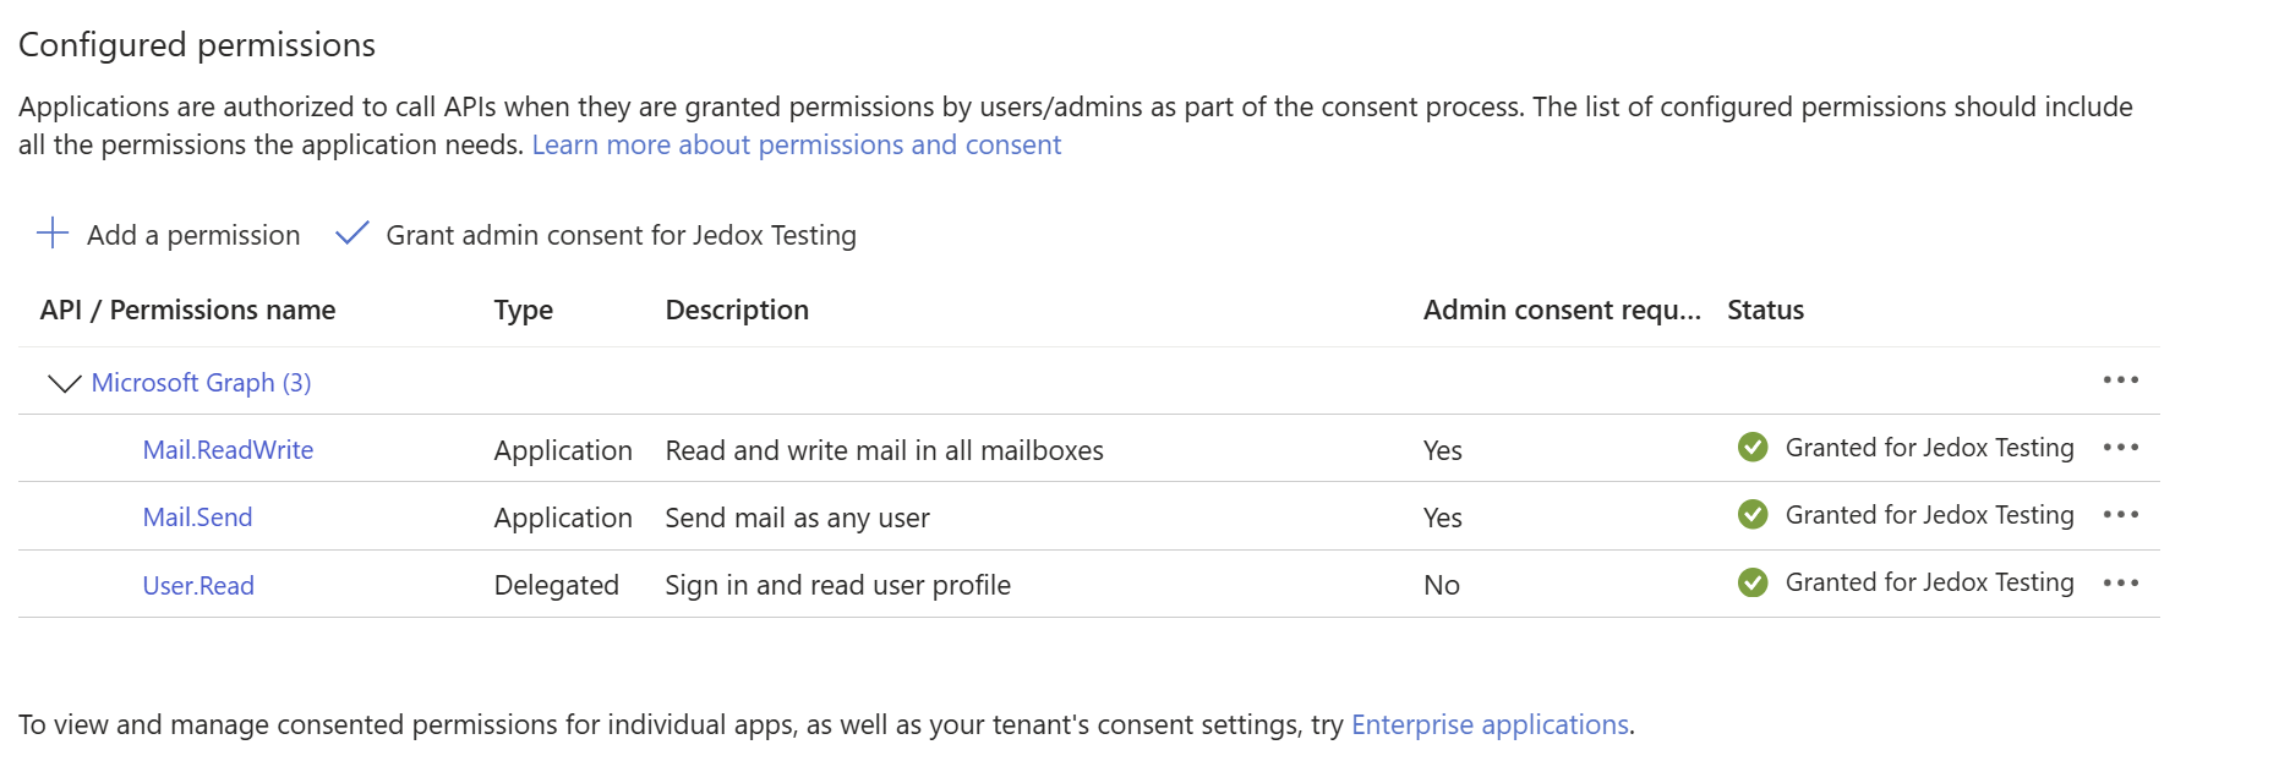
- Under API Permissions:
- Add the following application permissions for Microsoft Graph:
- Mail.ReadWrite
- Mail.Send
- User.Read
- Click on the "Grant Admin Consent" button (if you have admin permissions) or wait until an administrator has approved your request.
- Add the following application permissions for Microsoft Graph:
- Enter the details from Azure in the Cloud Console setup as listed above.
Administrators who want to limit app access to specific mailboxes can do so by using the Exchange Access Policies. Note that, as mentioned in the referenced Microsoft article, it may take longer than an hour for changes to the application access policies to be applied to the Cloud Console.


